How do brand invitations and acceptance flows work in the Network module?
The invitation system ensures:
- Explicit consent before any data sharing
- Controlled onboarding of brands
- Secure collaboration across the network
Step-by-step guide
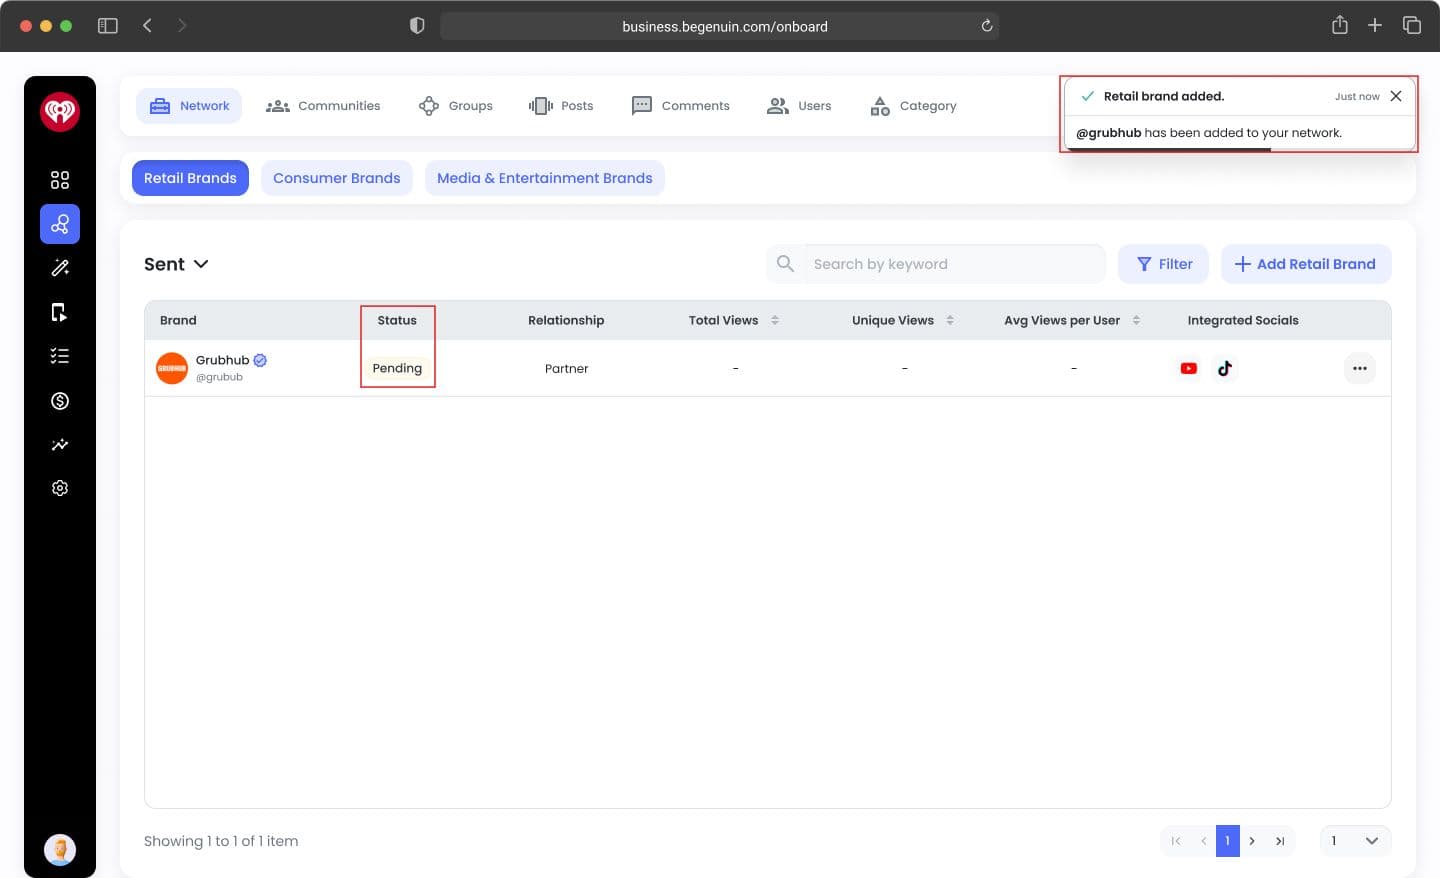
1. Invitation is sent
Once a brand is added:
- Email / SMS is triggered
- Status = Pending
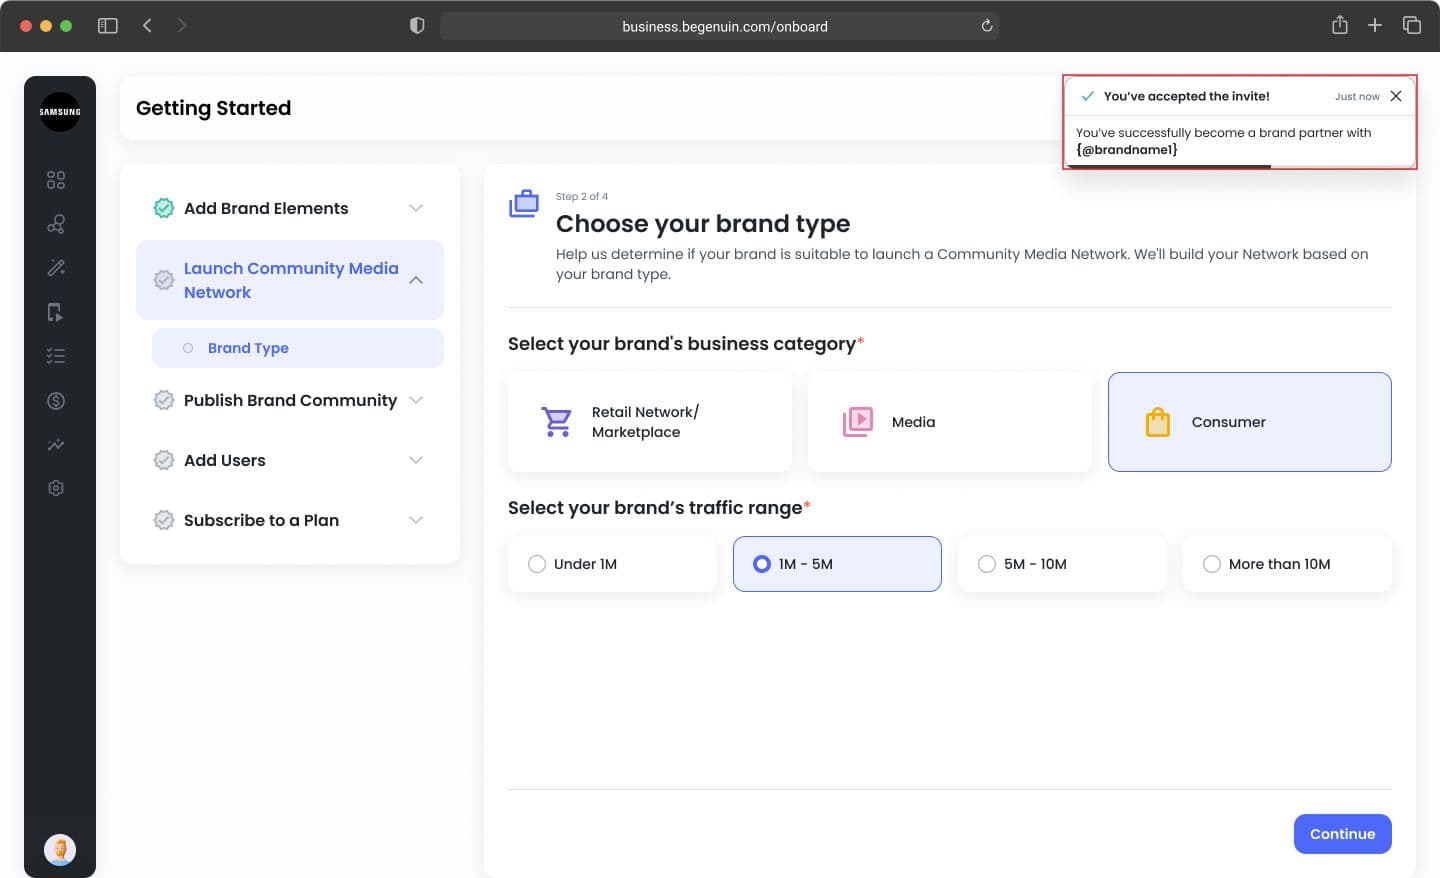
2. Accept invitation (via Email)
For existing brands
- Click Manage Request
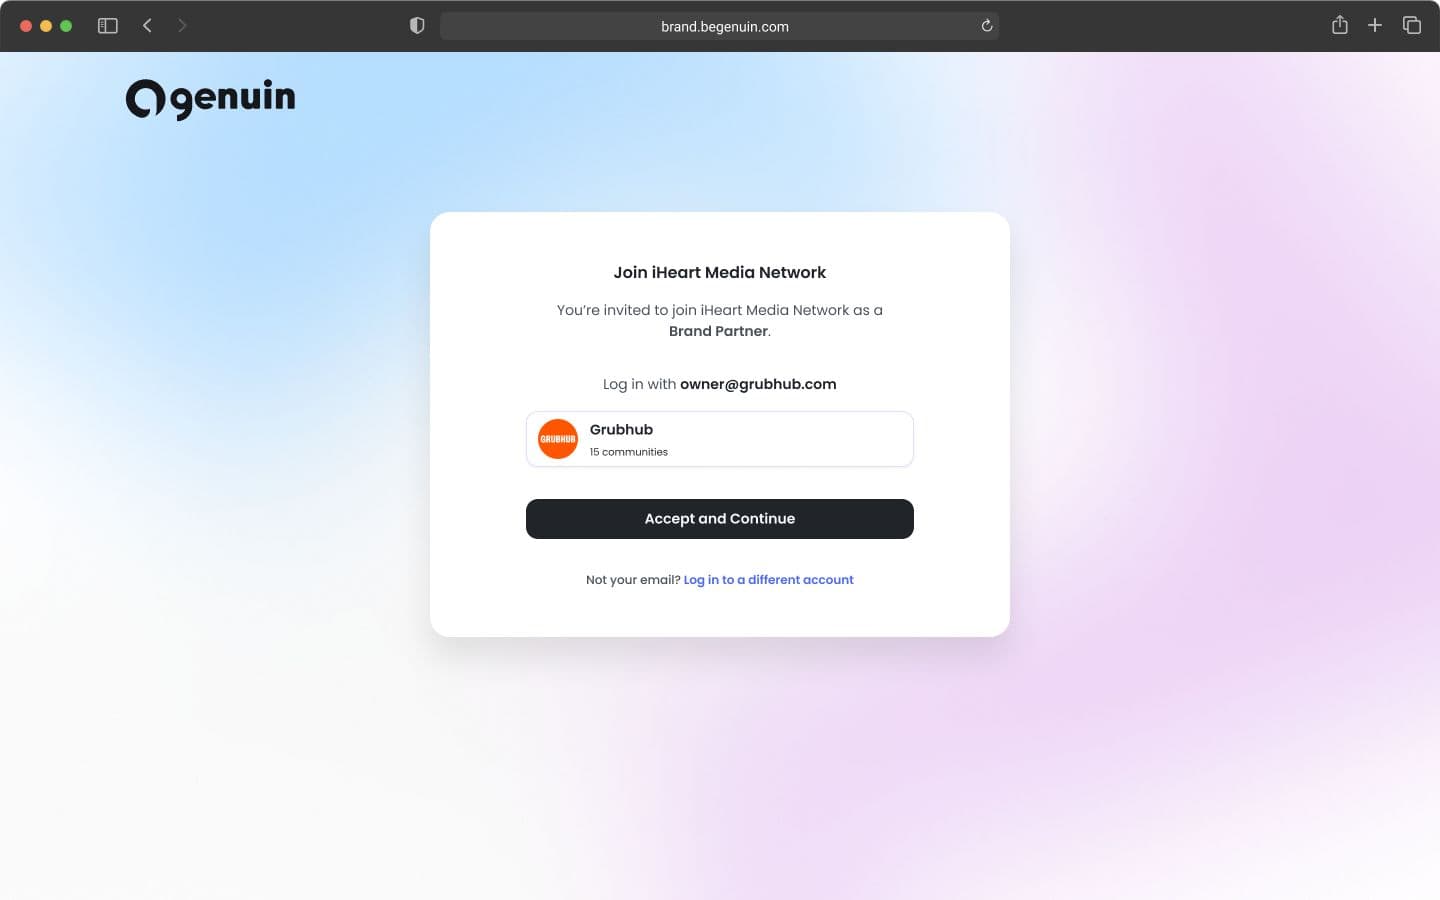
- Login to Brand Control Center
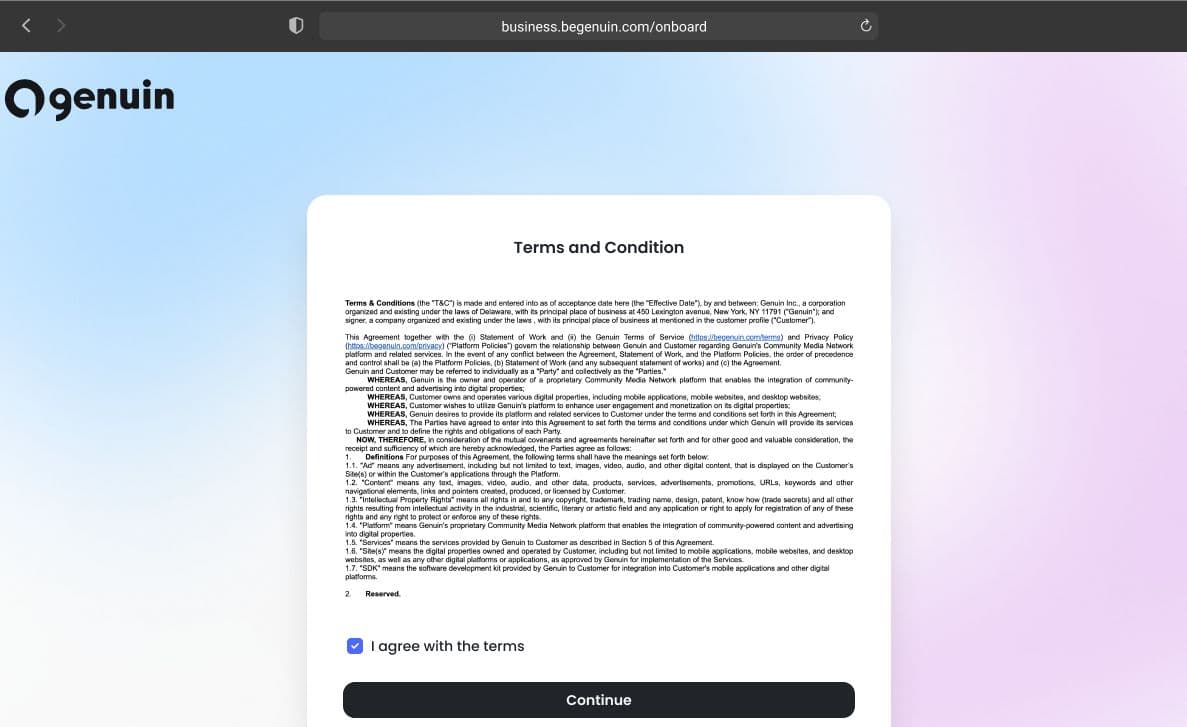
- Accept Terms (if required)
- Accept invite
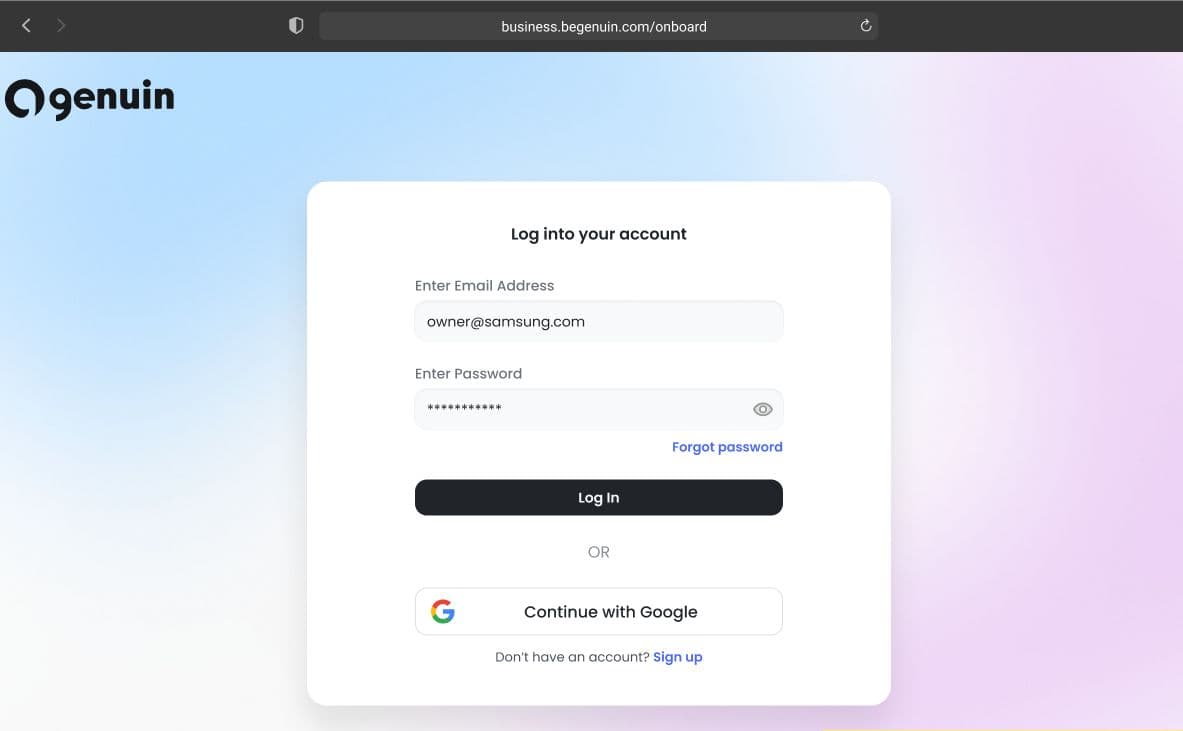
For new brands
- Click Manage Request
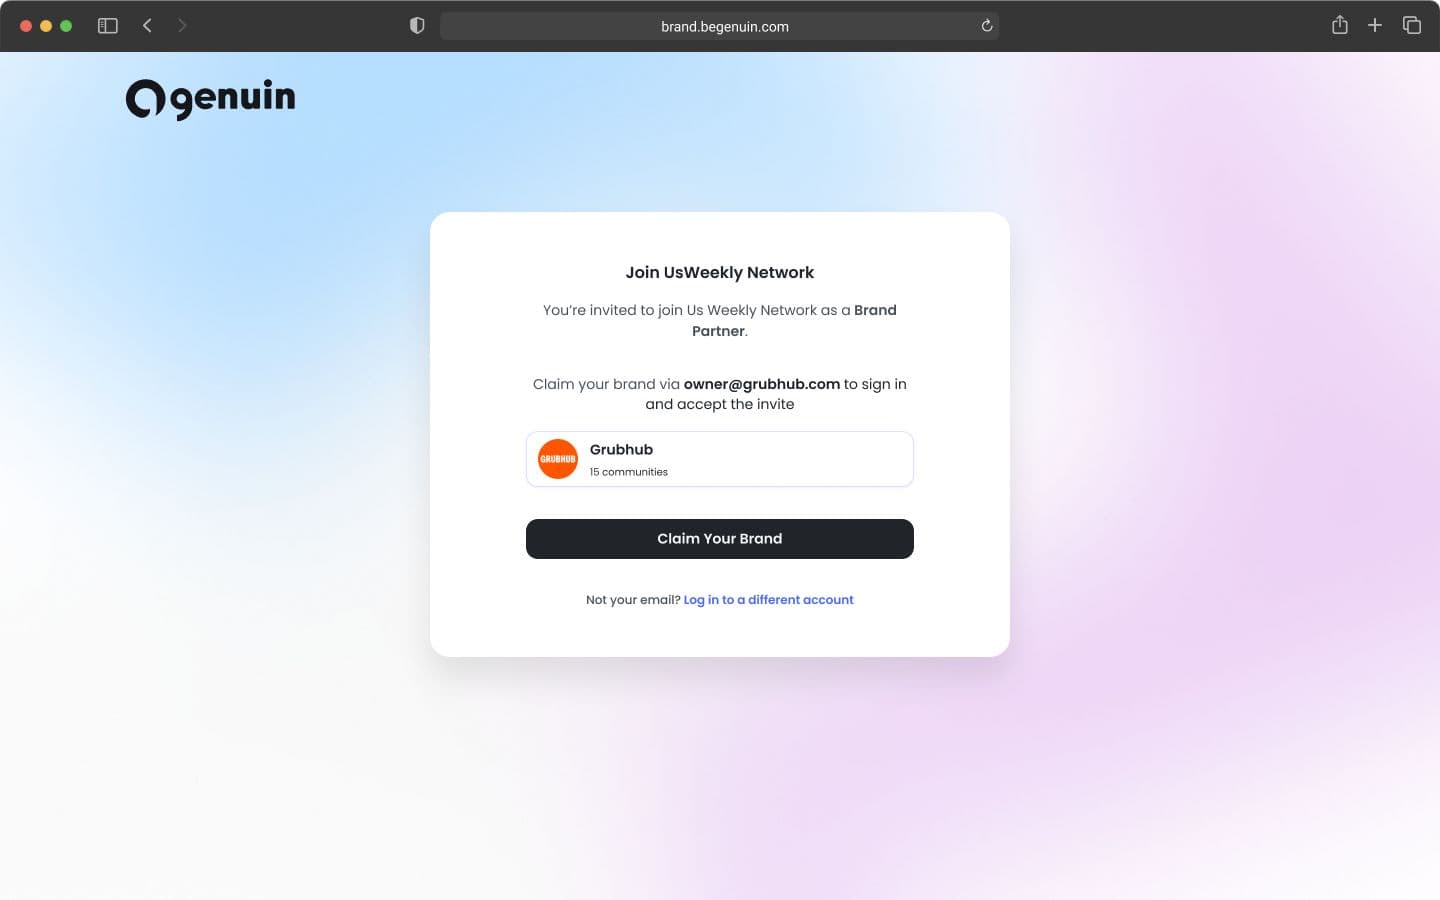
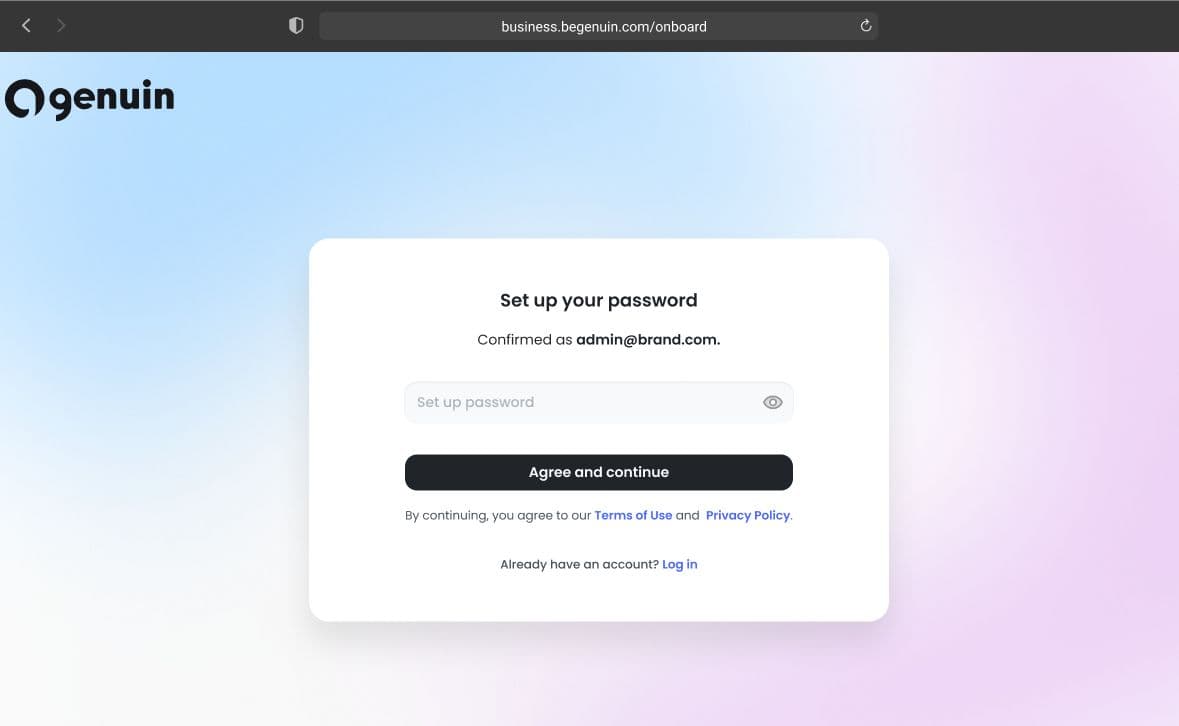
- Complete Claim Brand Profile

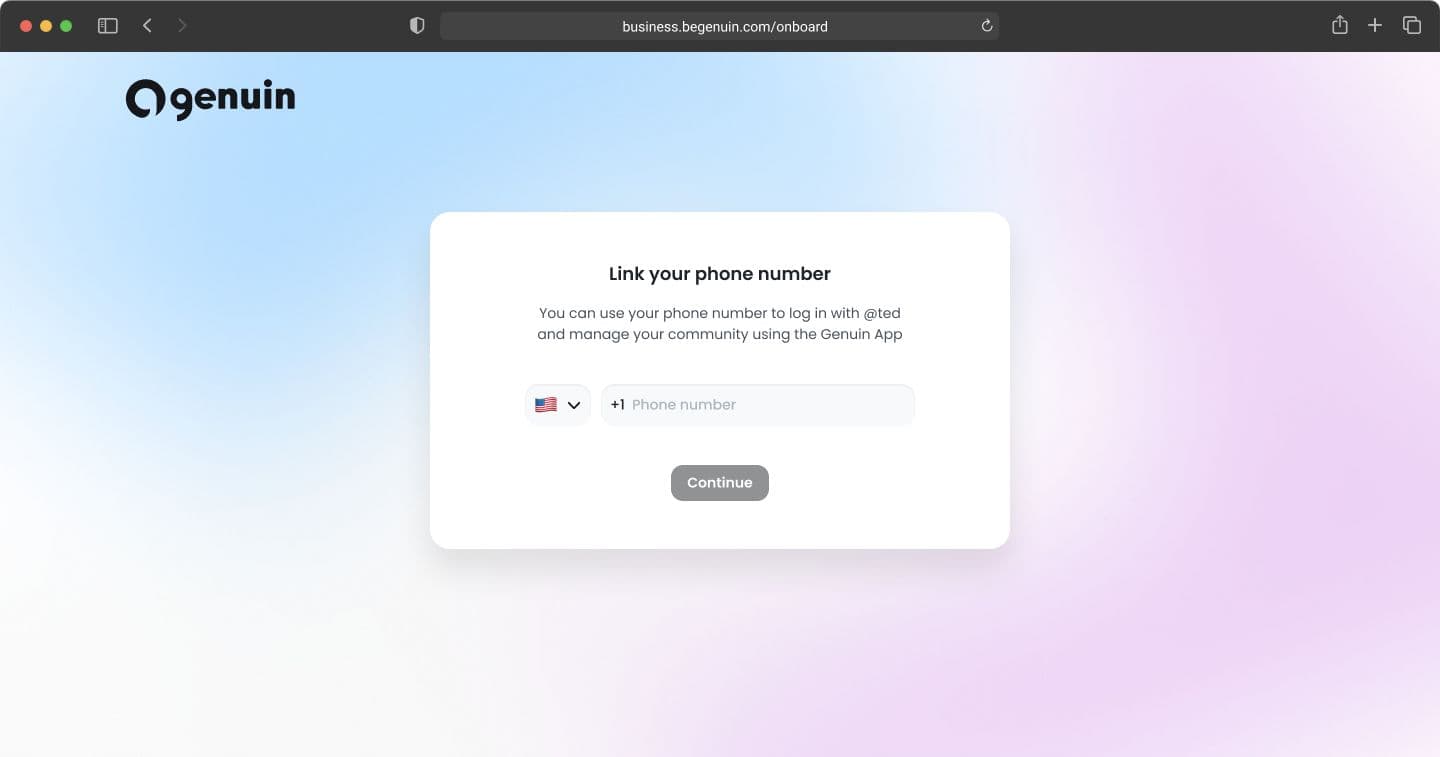
- Setup account (OTP + password)
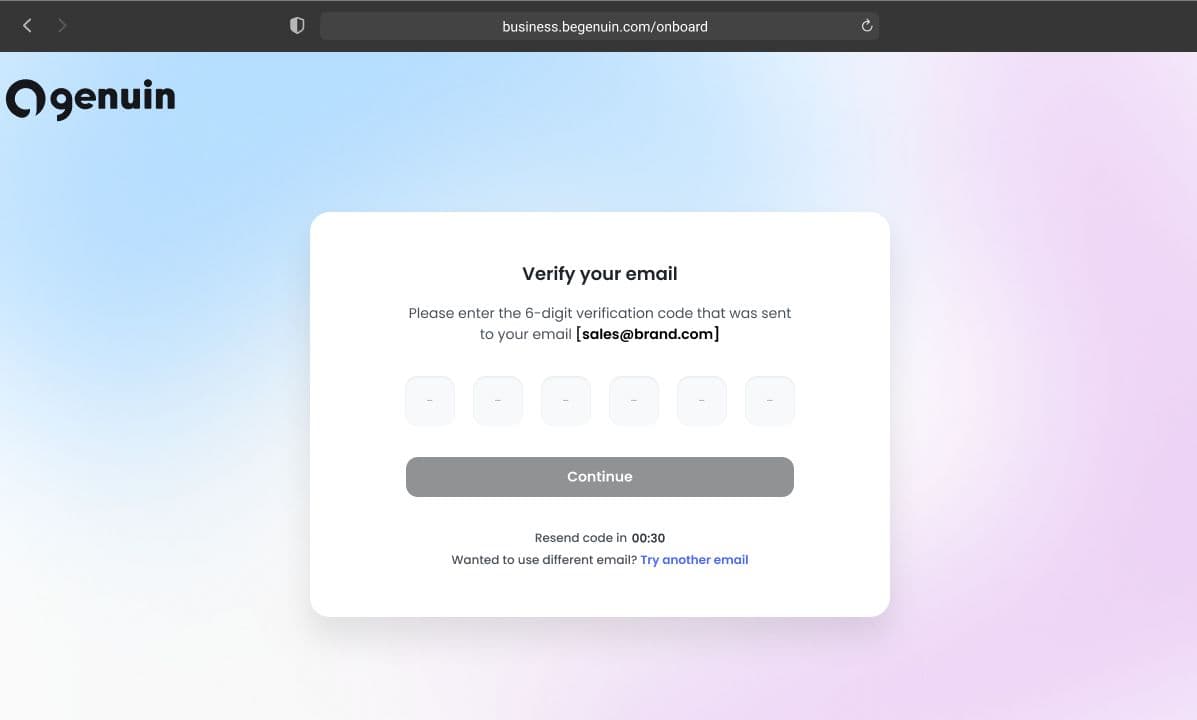
- Link Phone Number
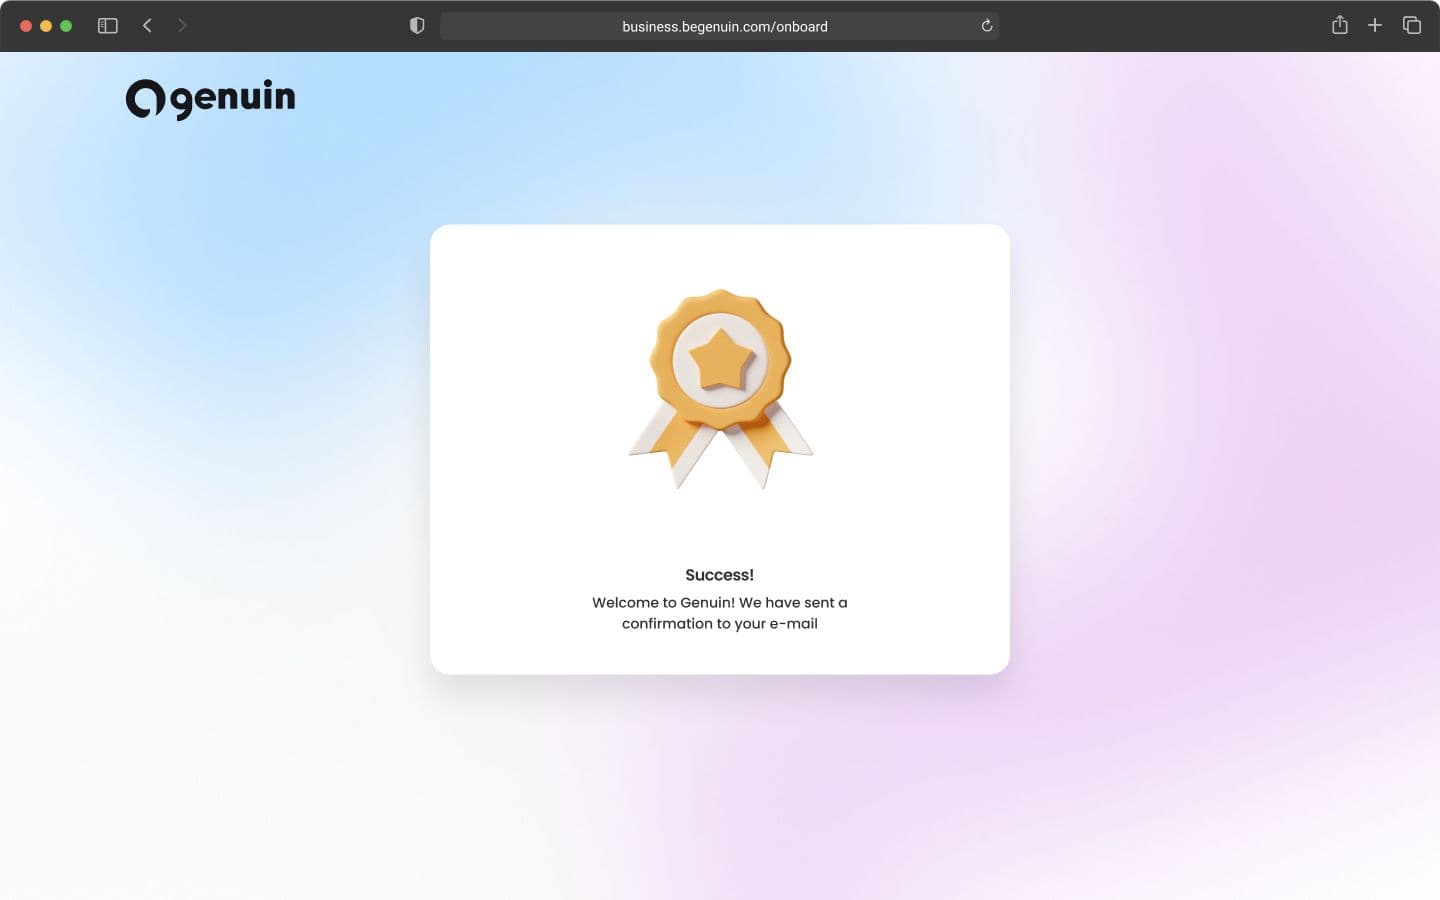
- Confirmation on E-mail
- Accept invite from Brand Partners
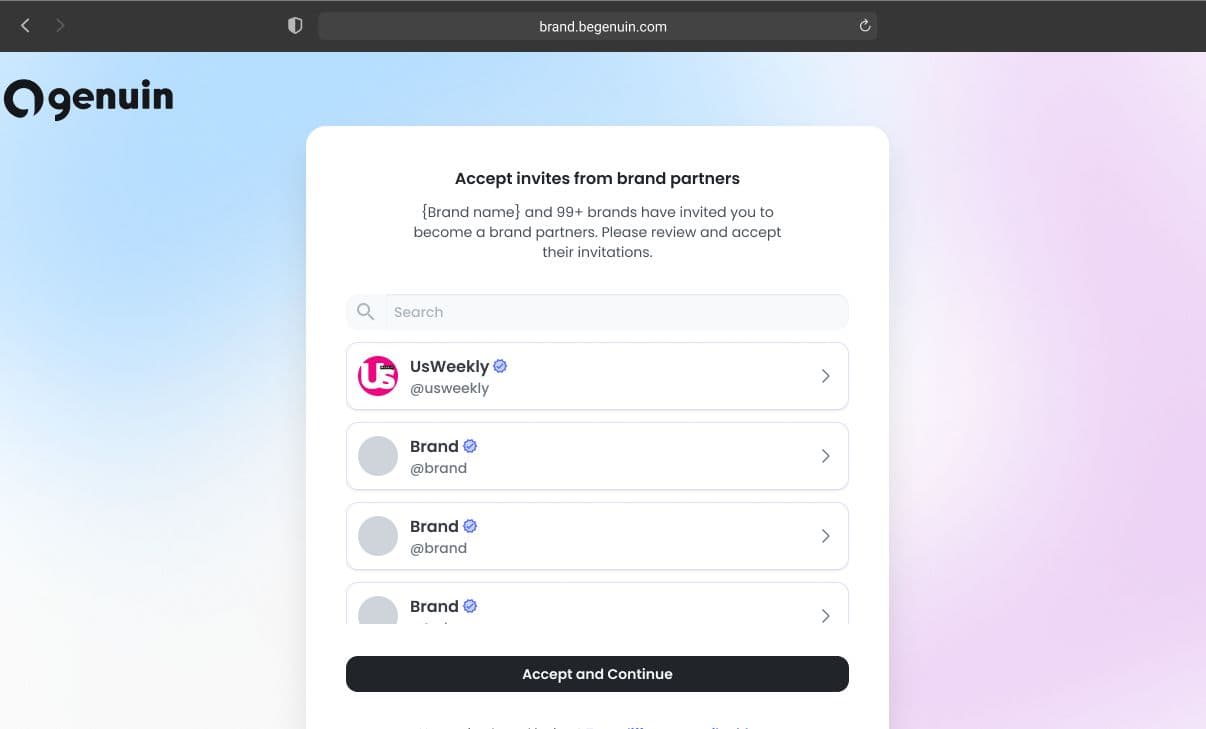
- Accept Terms

- Status
3. Accept invitation (via Brand Control Center)
Navigate to:
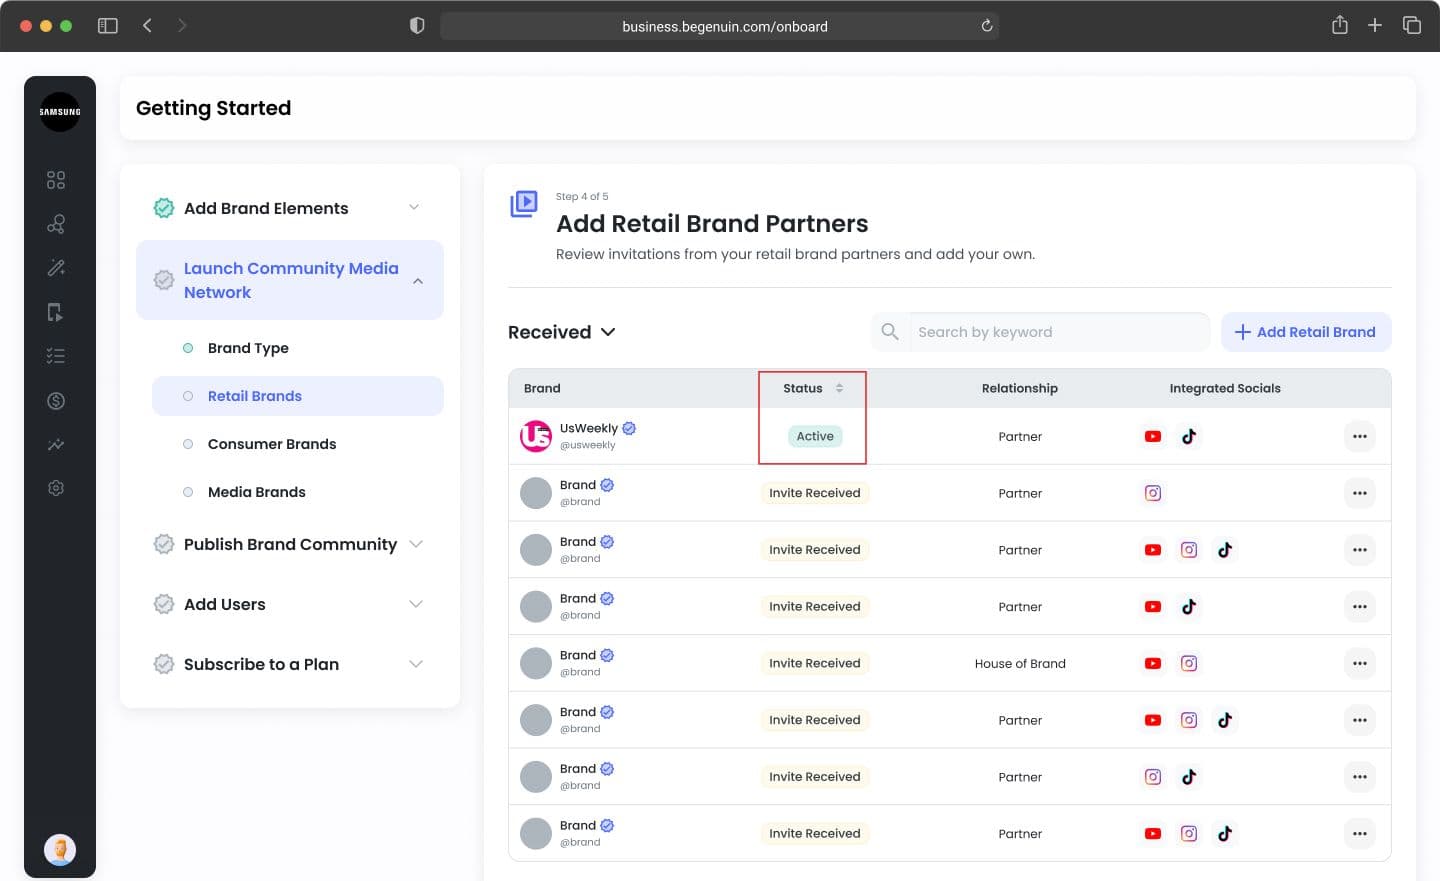
- Manage > Network
- Click: 3-dot menu > View Invite
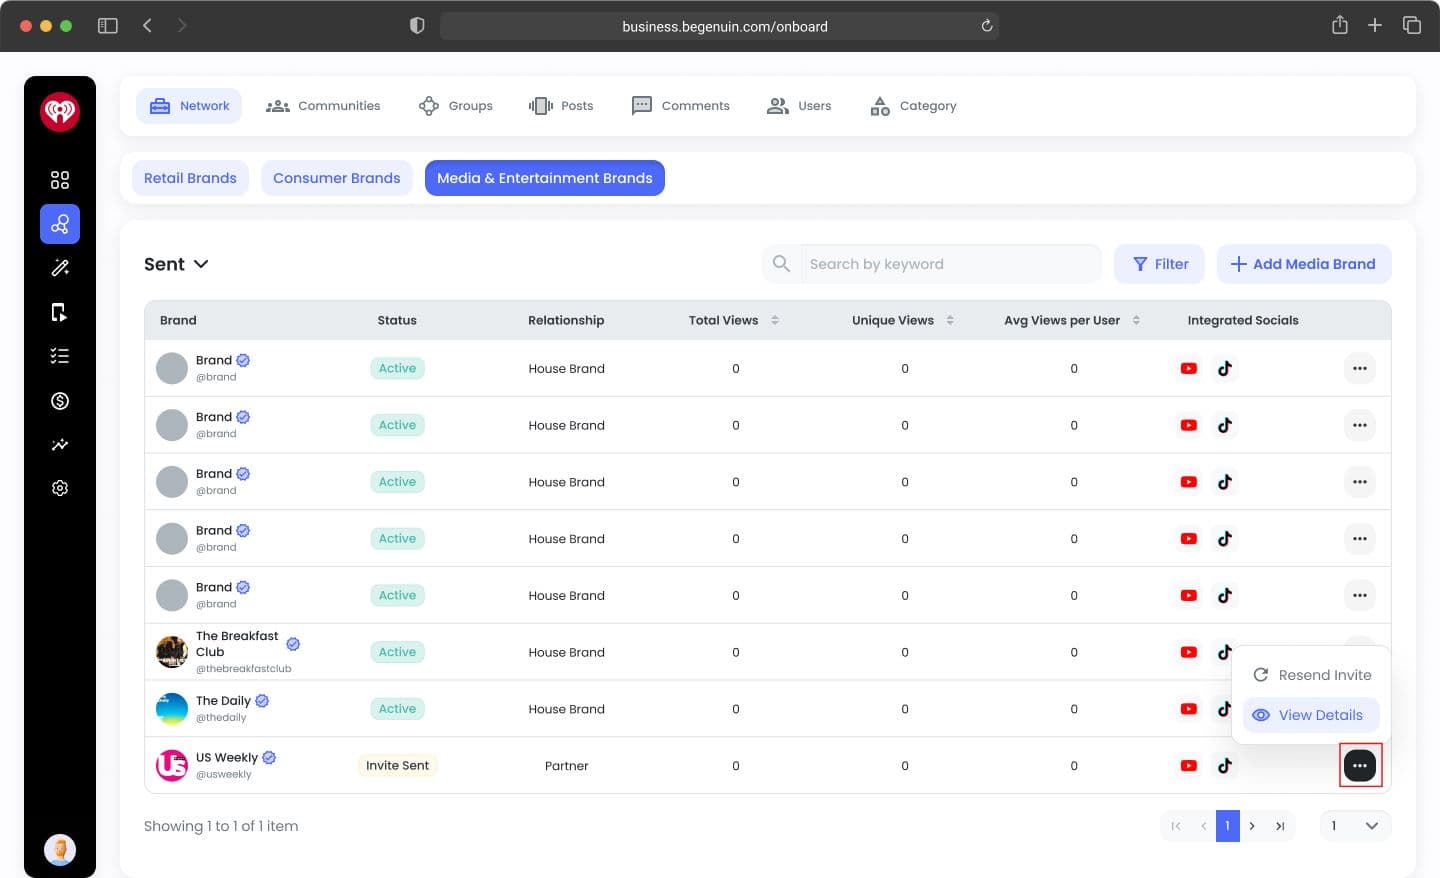
4. Review invite
You will see:
- Brand details
- Relationship type
- Invitation timeline
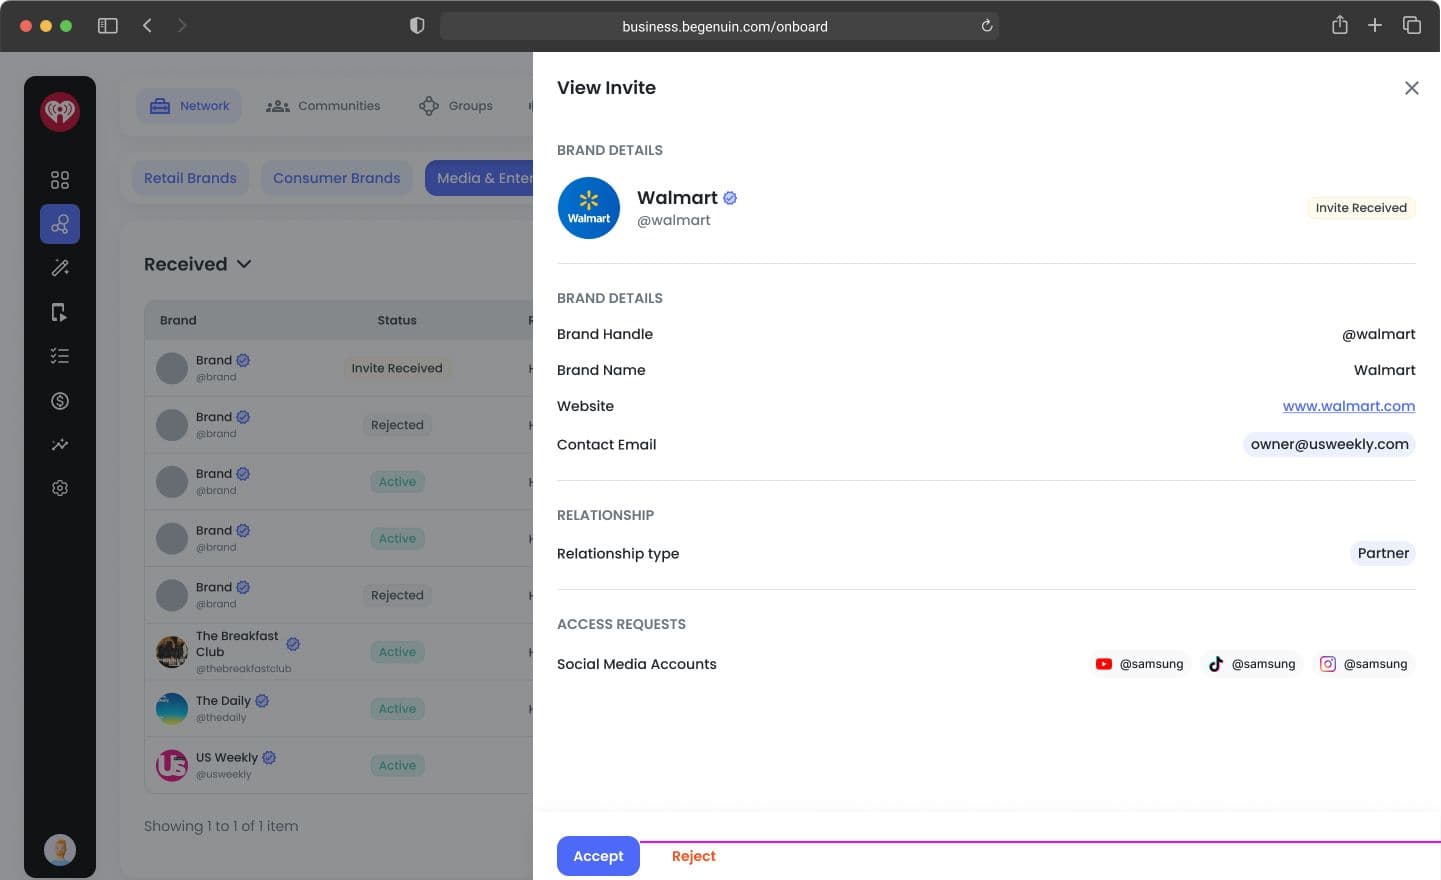
Actions:
- Accept
- Reject
5. Post action behavior
| Action | Result |
|---|---|
| Accept | Status = Active, network created |
| Reject | Status = Rejected |
6. Rejection rule
If rejected:
- Cannot re-invite for 7 days
- Tooltip shows remaining time
Important notes
- Accepting invite = full content consent
- No partial or per-handle consent
- Consent is included in email + acceptance
Specs & limitations
| State | Access |
|---|---|
| Pending | No access |
| Active | Full access |
| Rejected | No relationship |
Example scenario
A media brand invites a retail brand:
- Retail brand accepts - content sharing enabled
- Retail brand rejects - must wait 7 days for re-invite
Best practices
- Review relationship before accepting
- Ensure correct brand is selected during onboarding
- Avoid rejecting unless necessary (cooldown applies)
Future enhancements
- Granular consent controls
- Contract-level agreements
