How can I import videos using JSON feeds in the Brand Control Center?
Direct Import via JSON enables brands to operationalize content ingestion at scale without engineering effort.
It helps you:
- Eliminate manual uploads: Move from one-by-one uploads to automated ingestion from your APIs.
- Use AI to handle schema complexity: OctoAI maps your API fields (even non-standard ones) to Genuin’s system fields.
- Accelerate publishing workflows: Import content instantly or schedule recurring ingestion in one flow.
- Maintain consistent content pipelines: Automate daily, weekly, or monthly imports with predictable delivery.
- Retain full control over publishing: Choose between draft review, auto-publish, or scheduled posting.
For consumers, this results in:
- Continuous content freshness
- Higher-quality, structured video experiences
- Reliable content cadence
Operational Guide: Step-by-Step Instructions
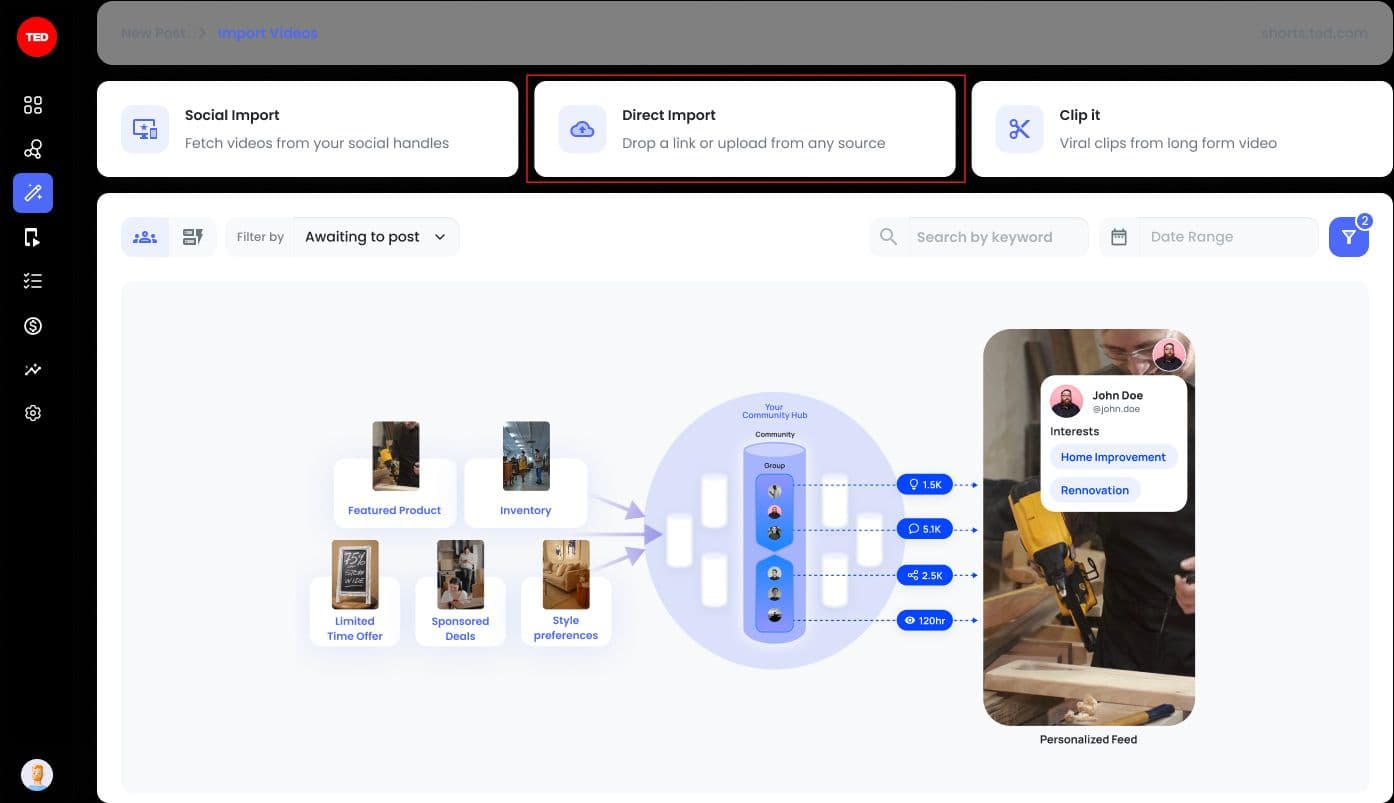
1. Access the Direct Import Interface
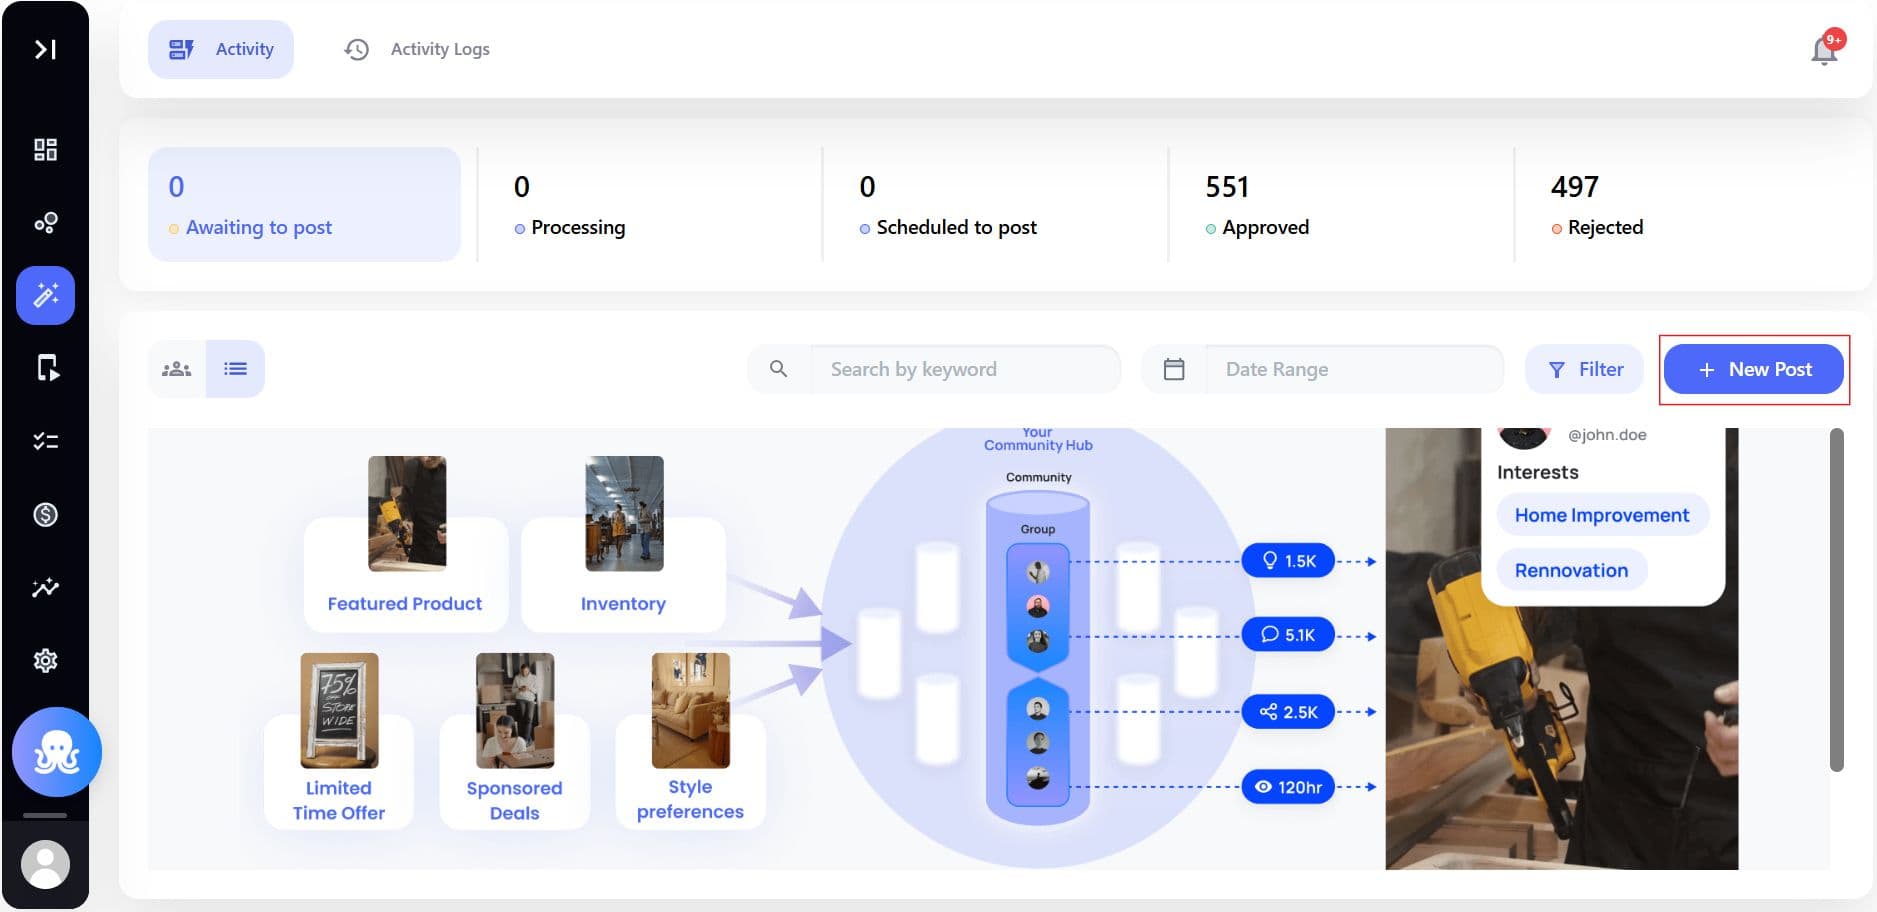
To begin, navigate through the following path: Curate > Activity > New Post.
Locate and select the Direct Import option to proceed.
From the dropdown, select:
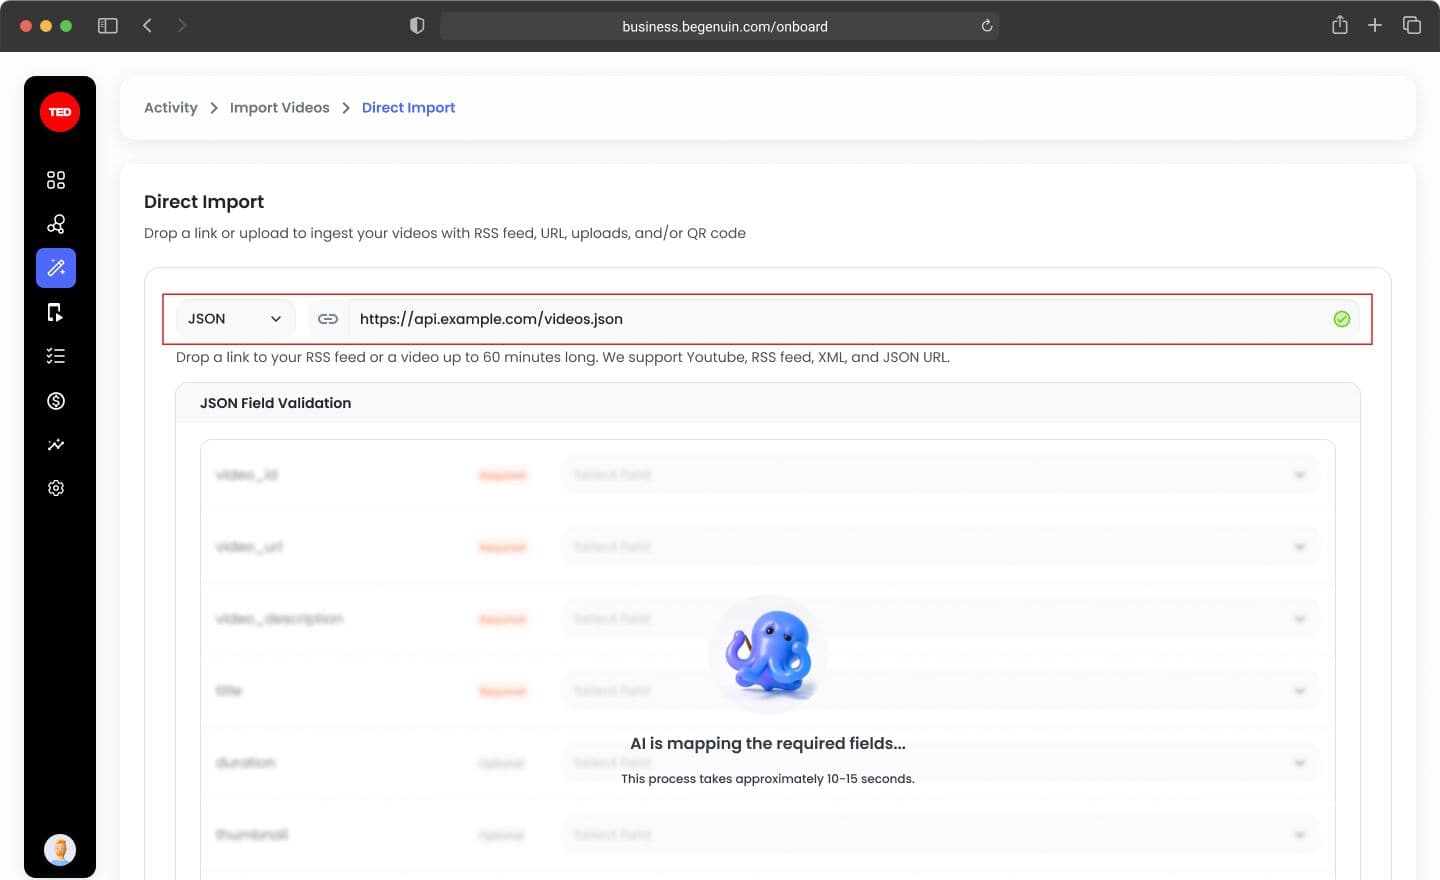
- JSON (mandatory selection among RSS / JSON / XML)
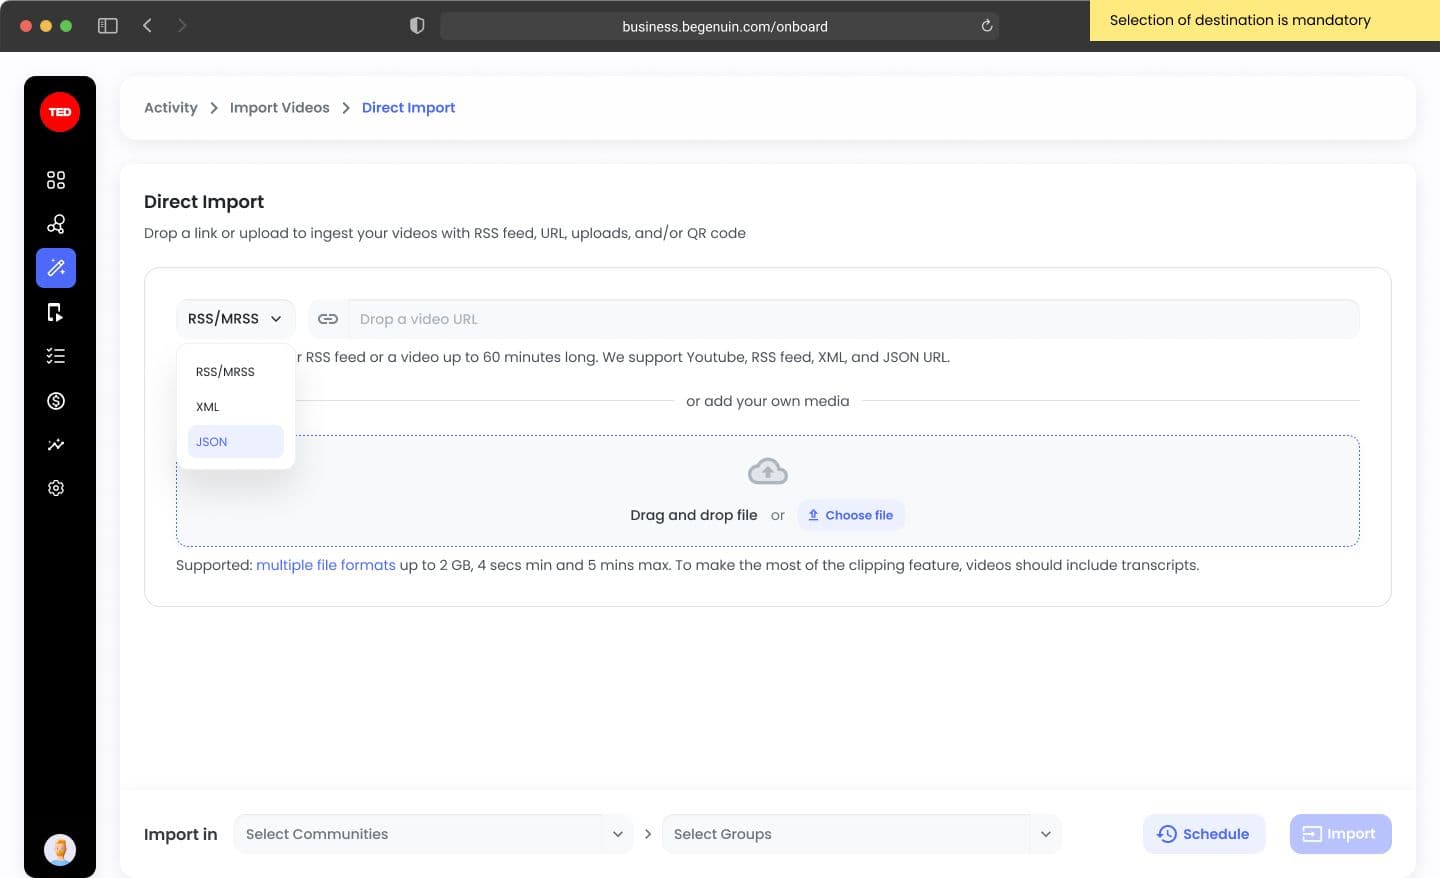
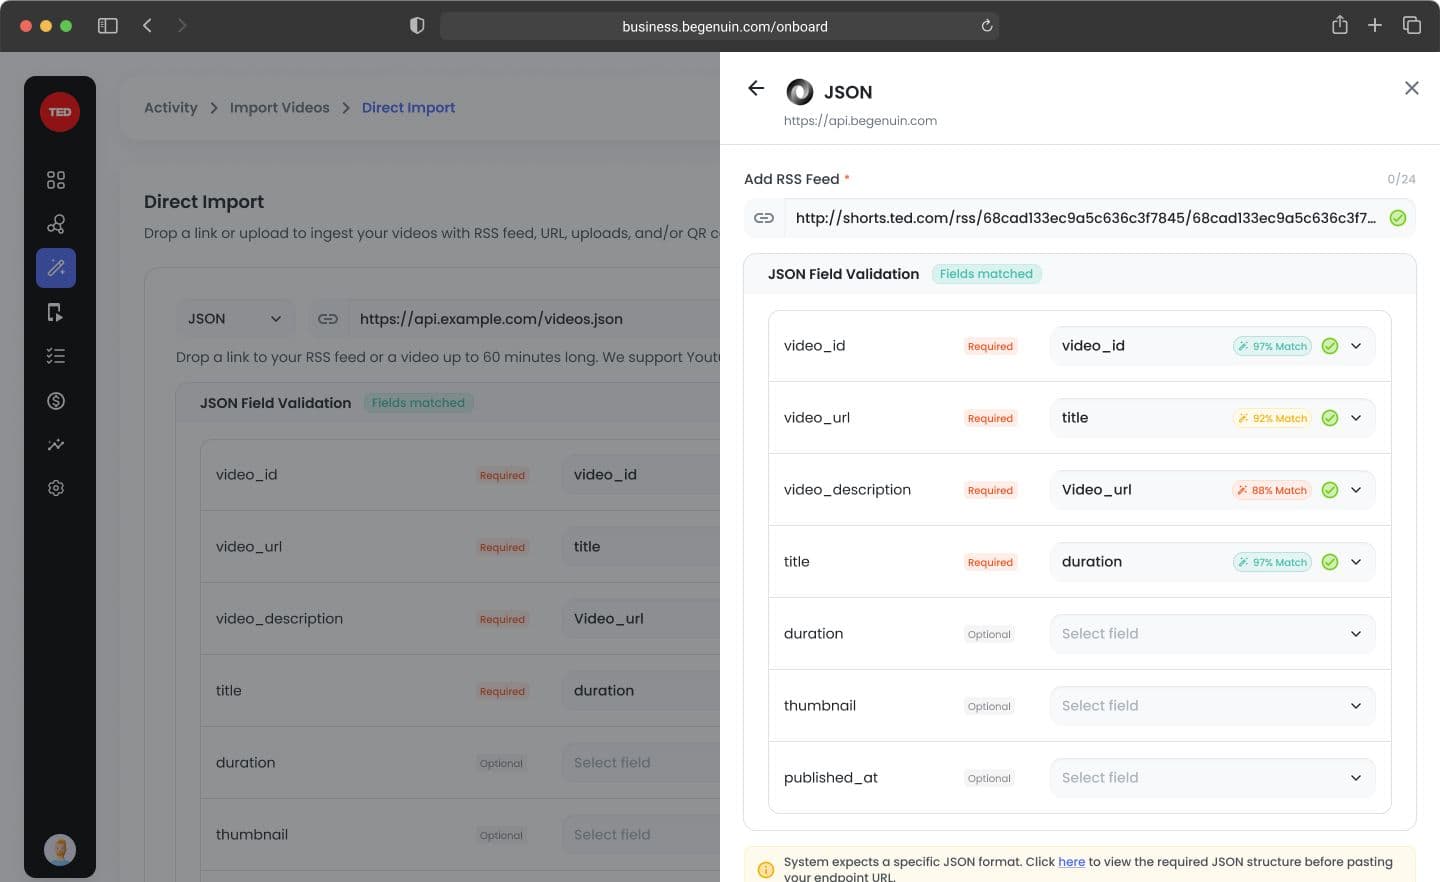
Step 2: Paste JSON URL and validate
Paste your JSON endpoint.
System behavior:
- URL validation begins immediately
- Upload section becomes disabled once URL is entered
- Removing URL re-enables upload section
Validation stages:
- Format validation
- Duplicate scheduler check
- Accessibility check
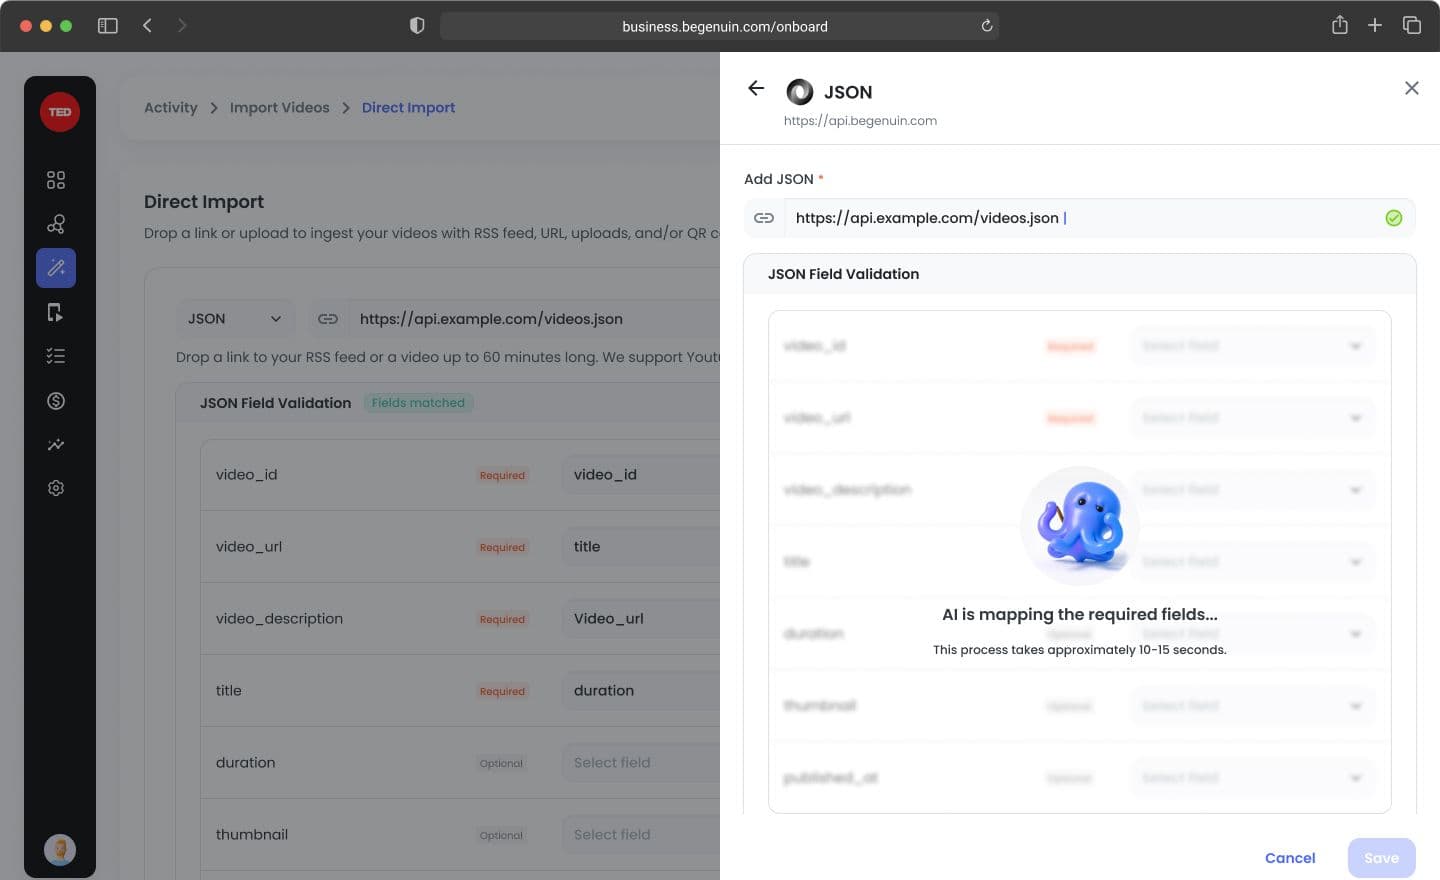
Step 3: AI mapping (OctoAI processing)
Once the URL is validated:
- OctoAI animation (GIF) starts automatically
- Message shown: “AI is mapping the required fields…”
- Processing time: ~10–15 seconds
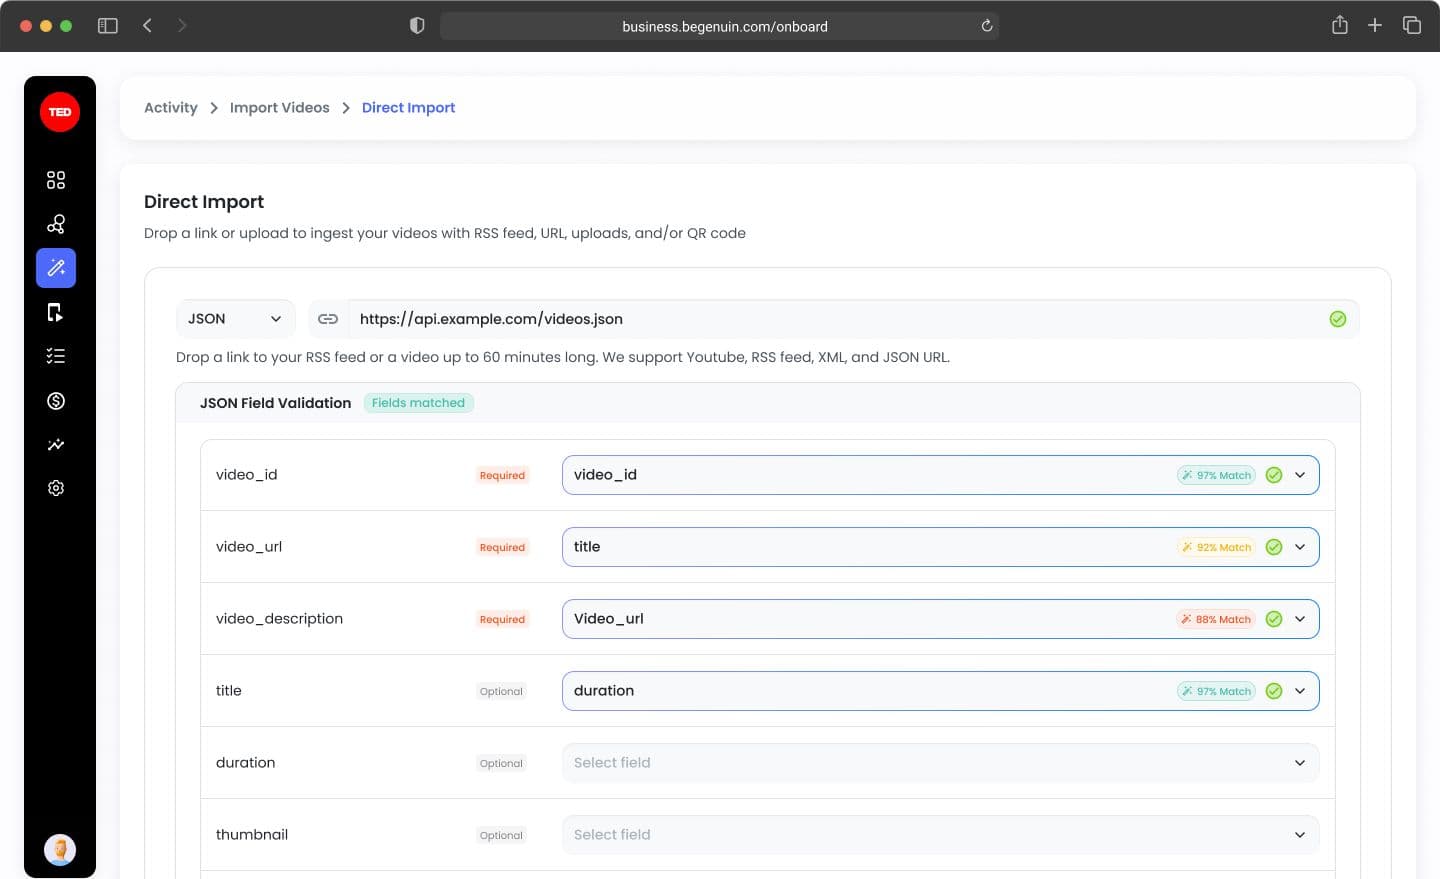
Step 4: Review AI-mapped fields
After processing:
- Fields are auto-mapped:
- video_id
- video_url
- title
- description
- duration
- thumbnail
- published_at
- AI-mapped fields:
- Highlighted briefly (~2 seconds)
- Show match rate (%) label
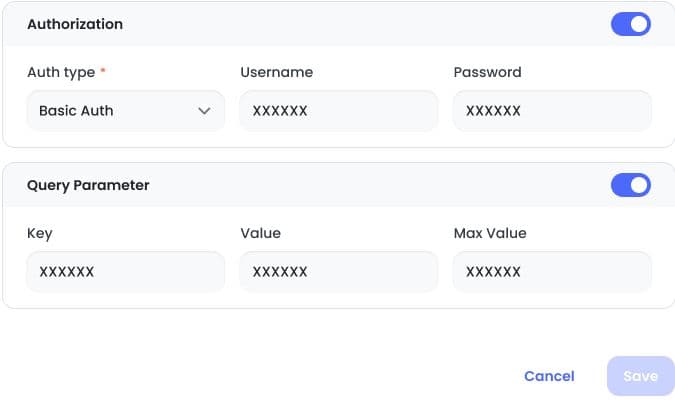
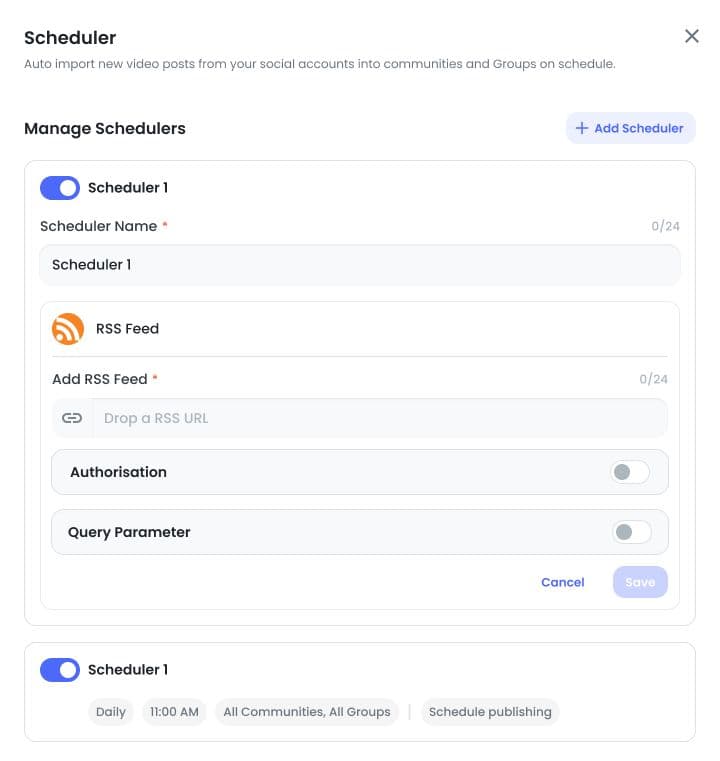
Step 5: (Optional) Configure Authentication & Query Parameters
Authentication toggle
When enabled:
- Basic Auth → Username + Password
- Bearer Token → Token input
Query Parameters toggle
Add:
- Key
- Start Value
- Max Value
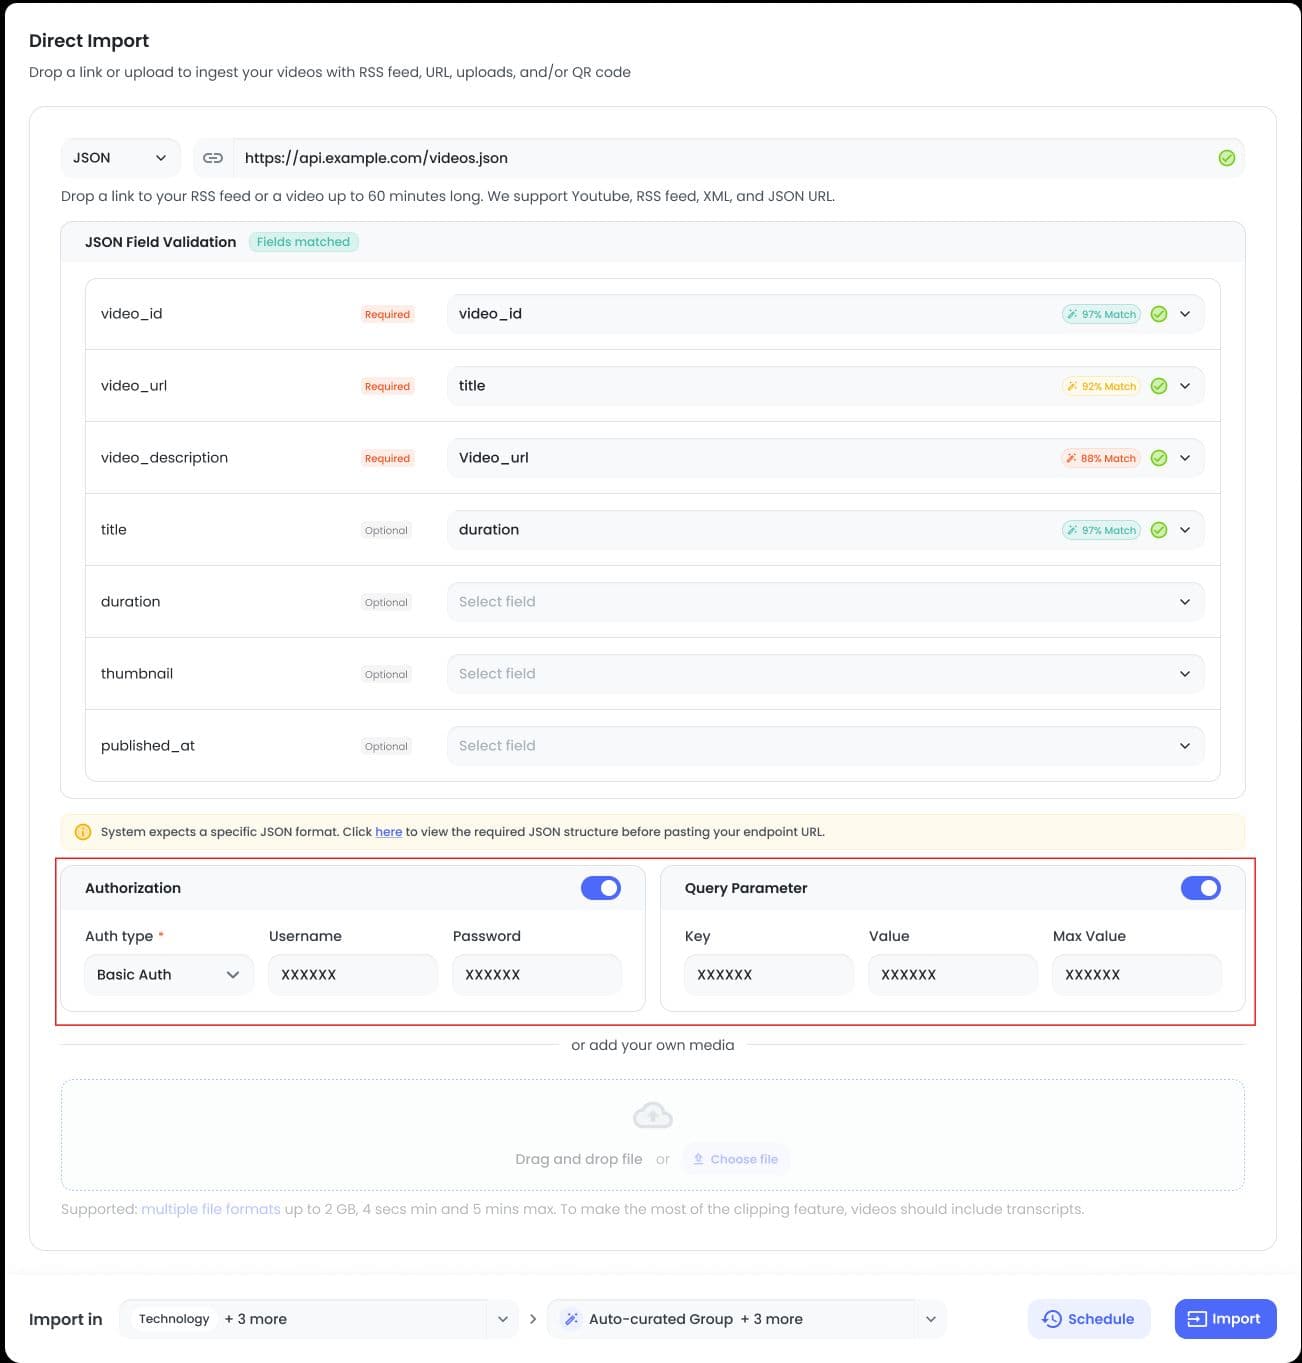
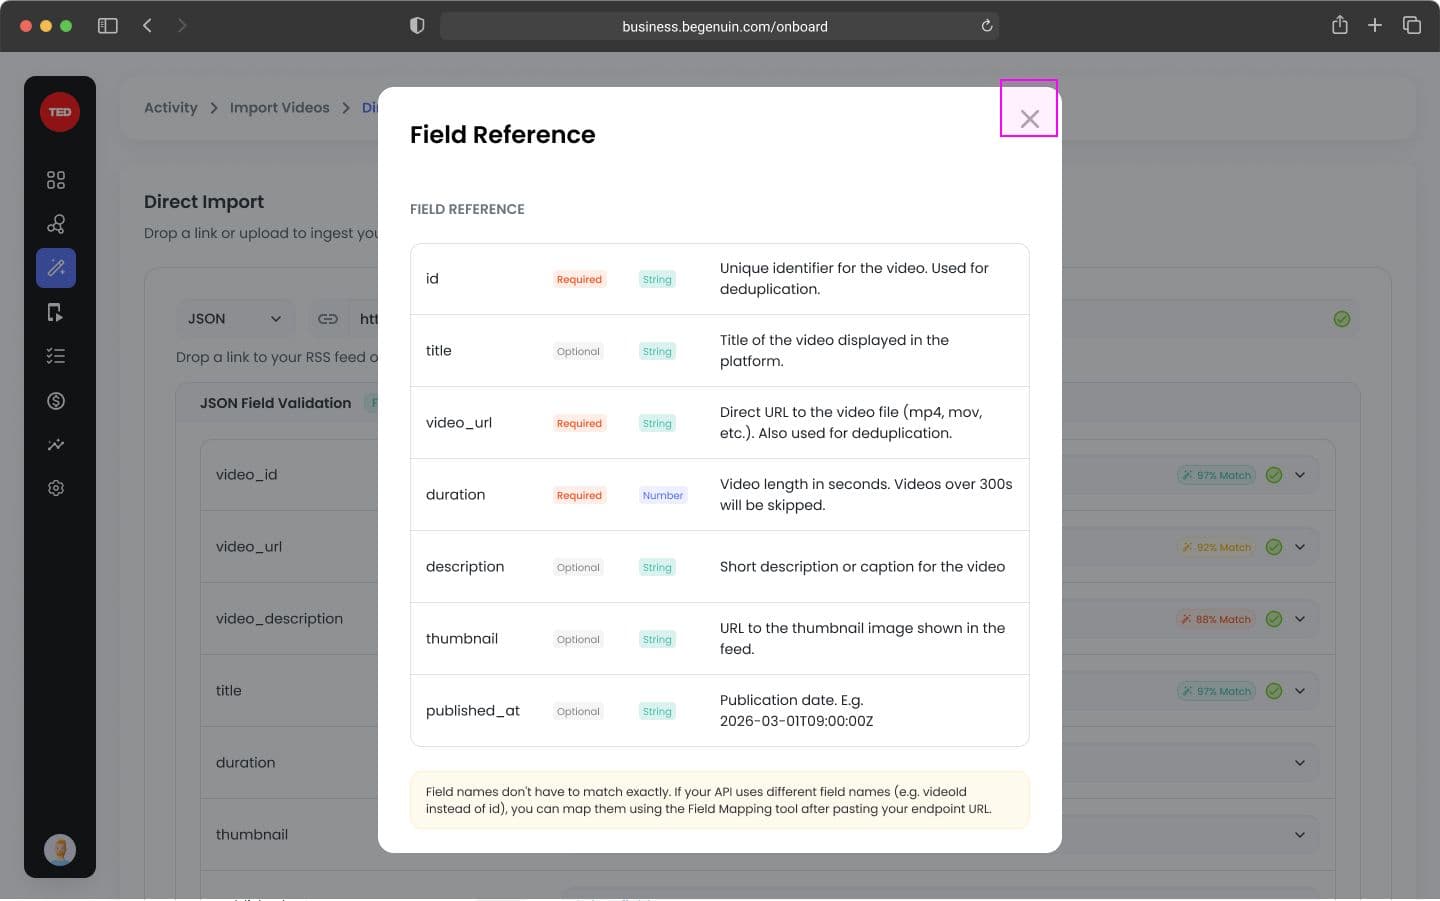
Step 6: Review JSON field reference (optional but recommended)
Click on “Note / System Notification” to open:
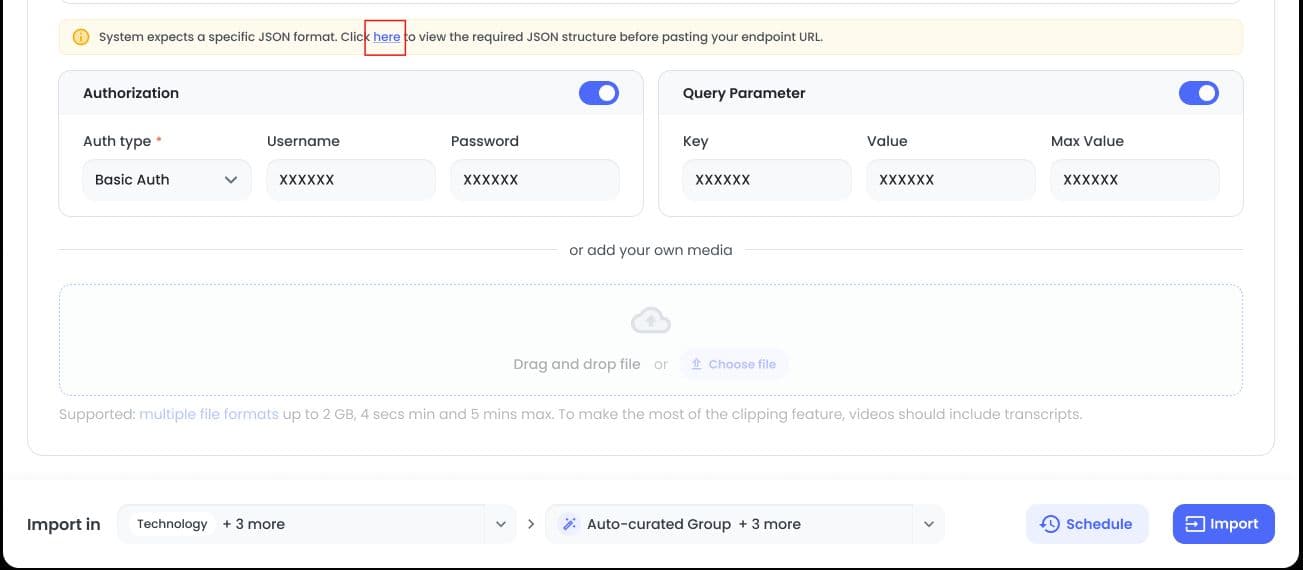
Field Reference window, showing:
- id (Required)
- title (Optional)
- video_url (Required)
- duration (Required)
- description (Optional)
- thumbnail (Optional)
- published_at (Optional)
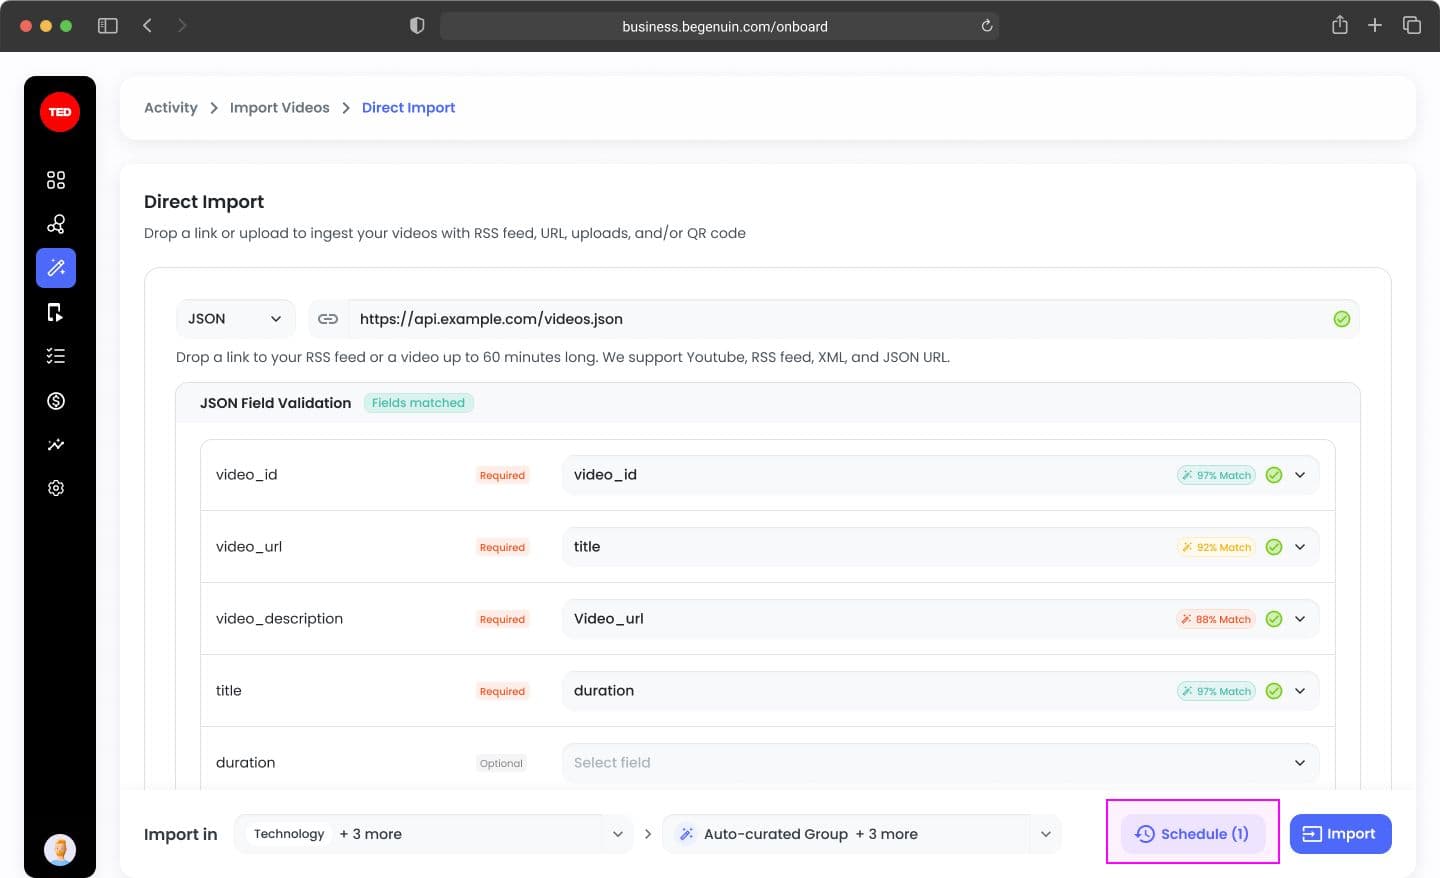
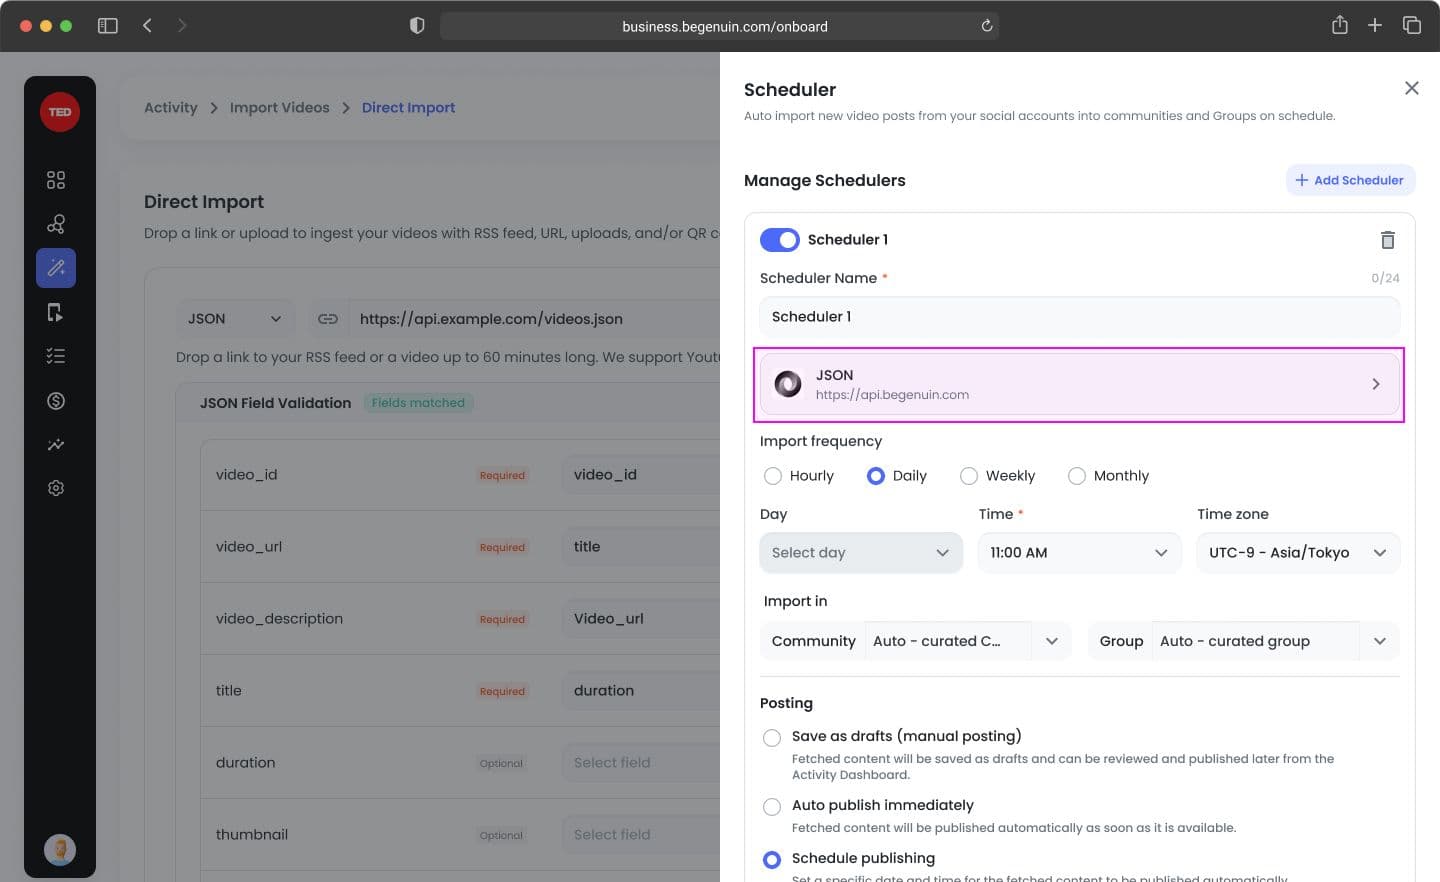
Step 7: Select community and group
- Select Community
- Select Group
The import button remains disabled until both are selected.
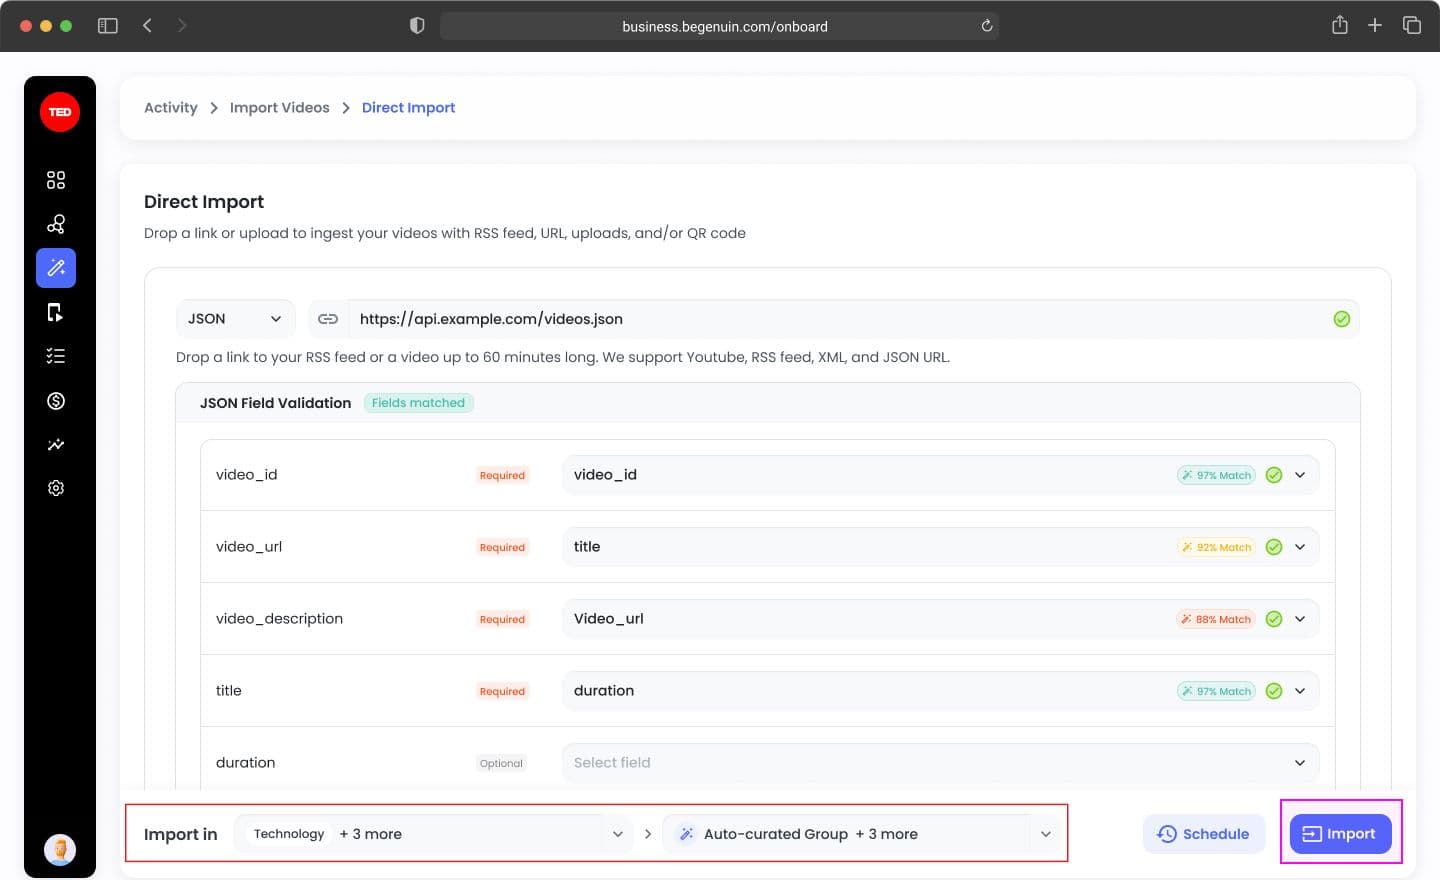
Step 8: Import or schedule
Click Import → opens modal:
Option A: Direct Import
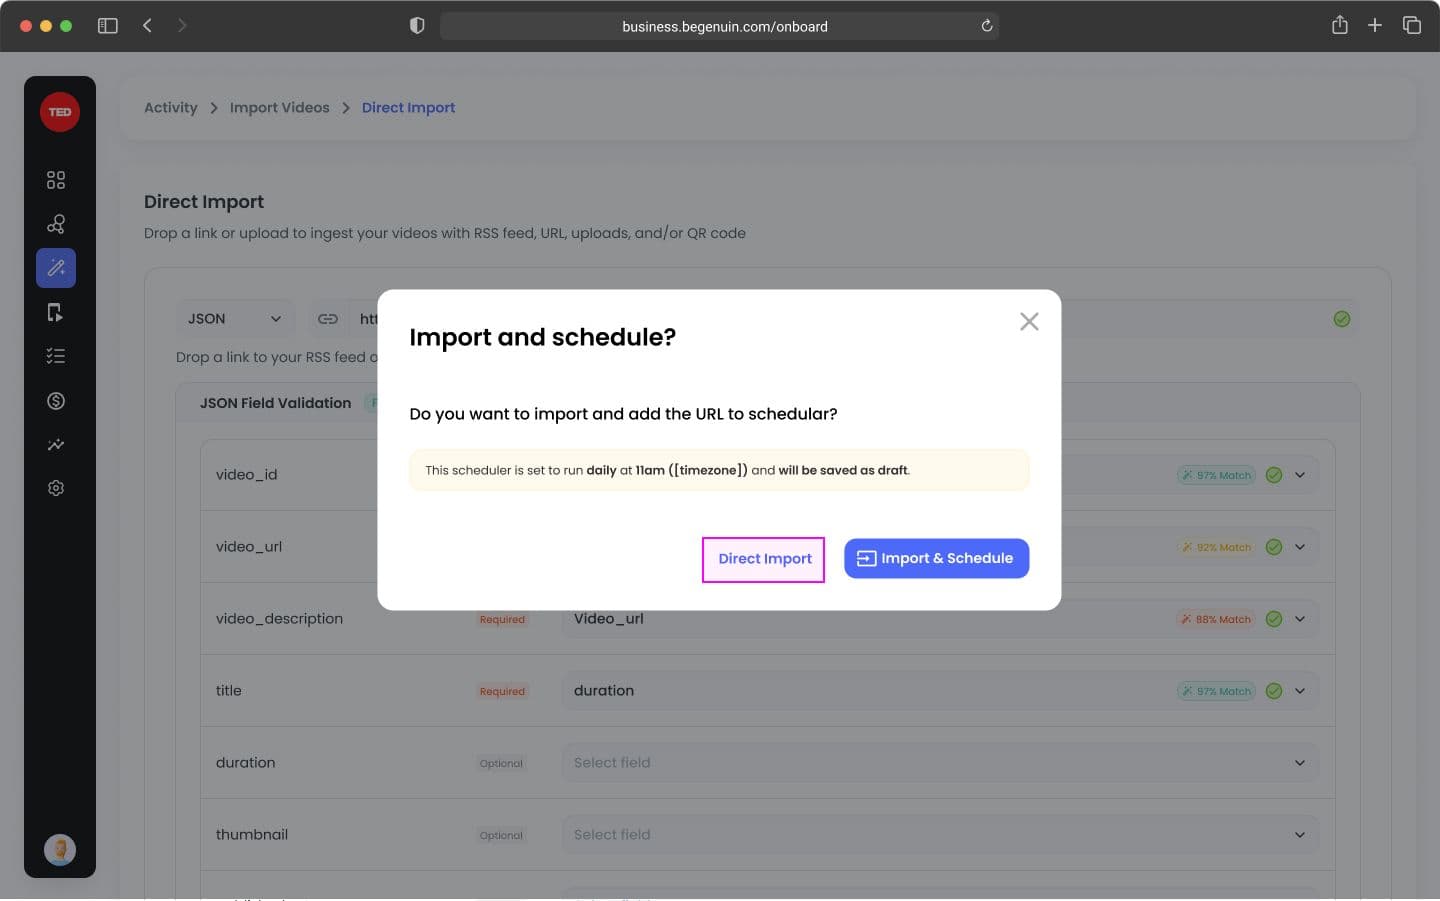
- One-time import
- No scheduler created
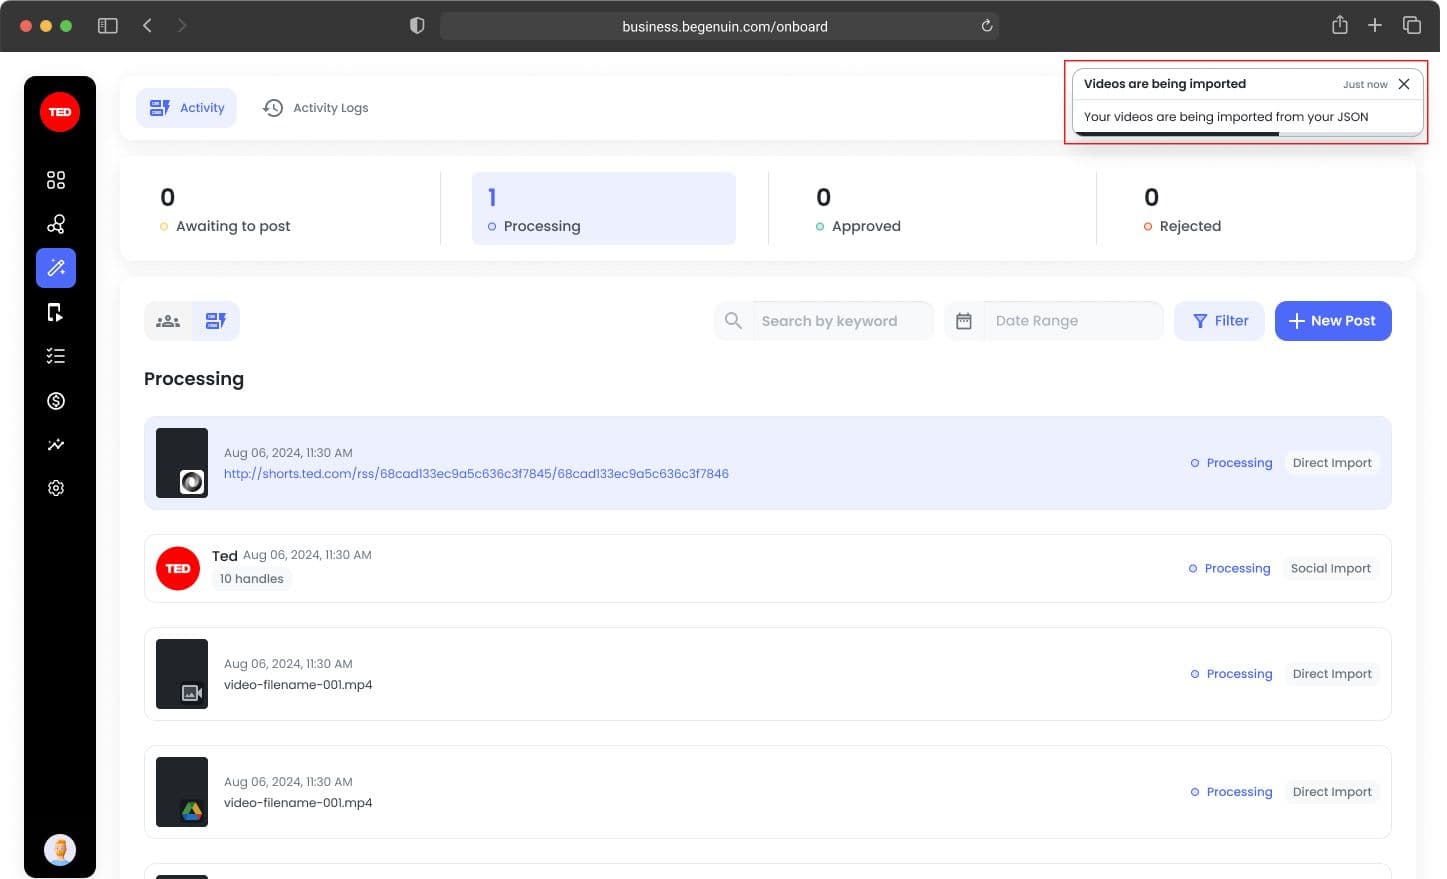
- Notification: “Videos are being imported from your JSON”
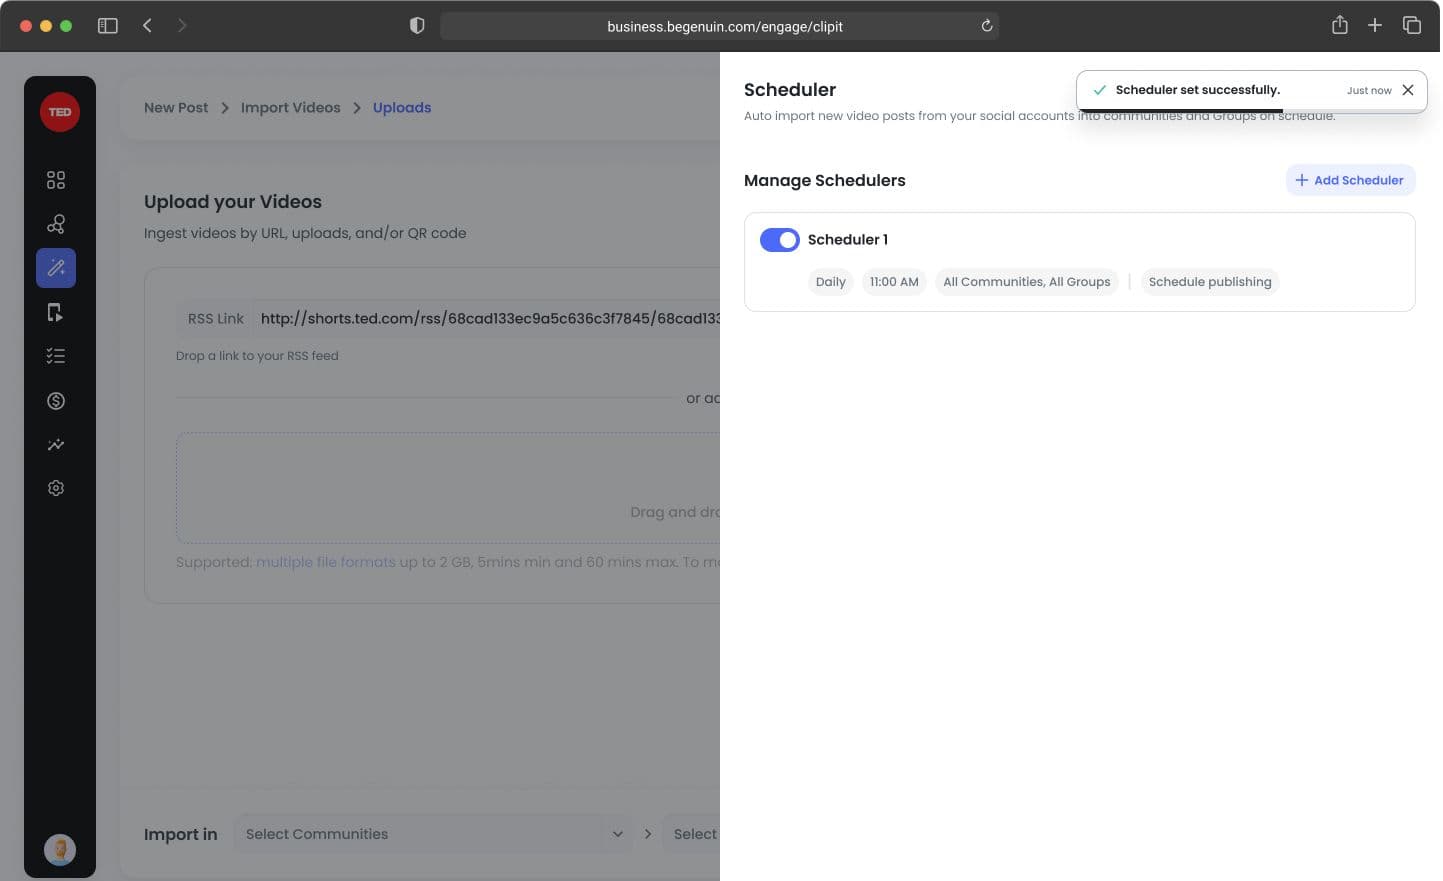
Option B: Import & Schedule
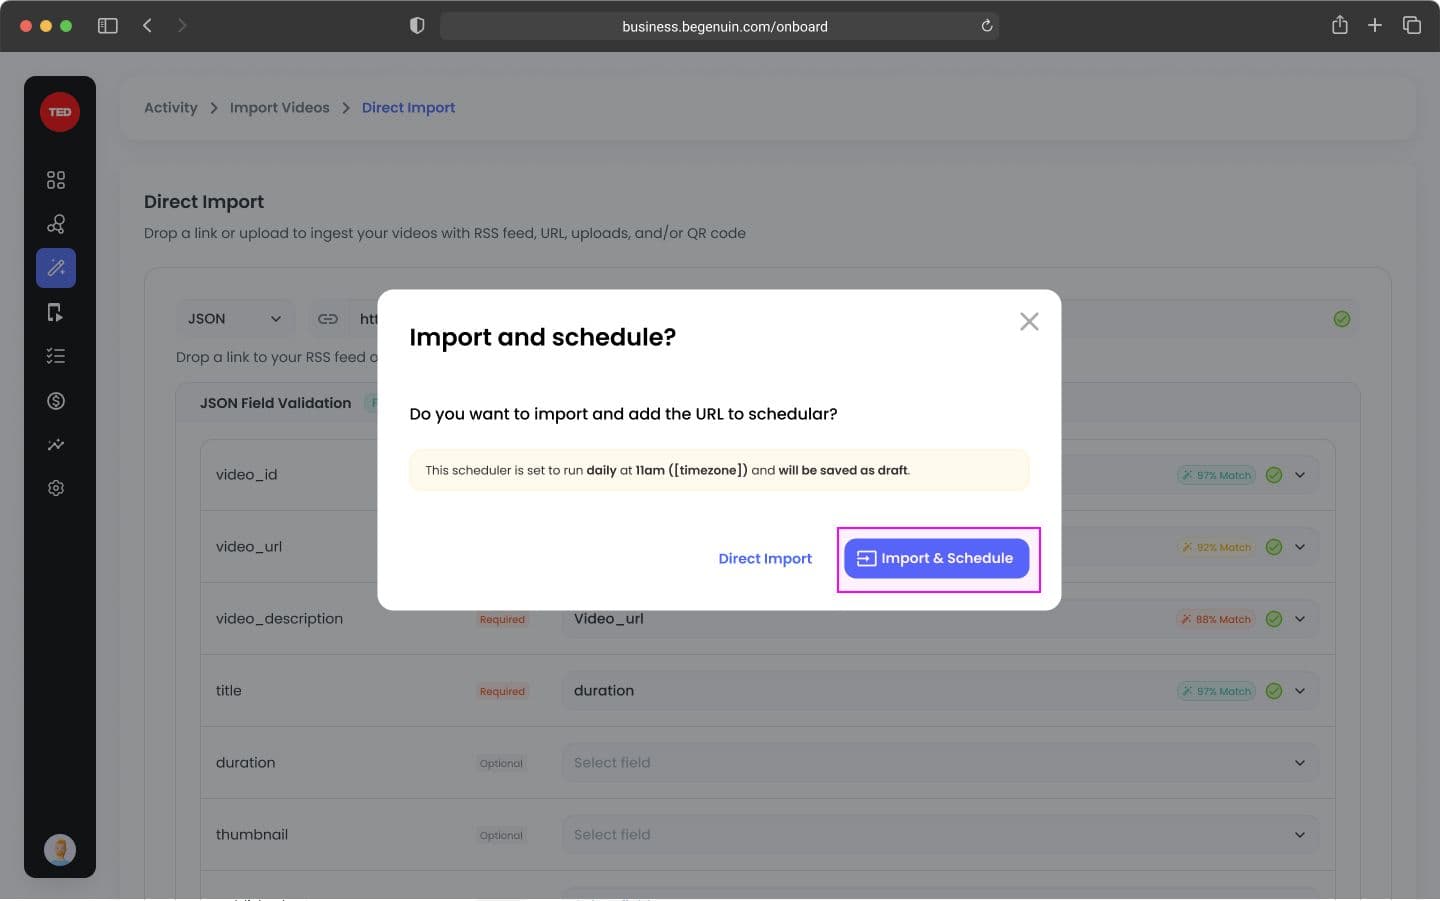
- Import runs immediately
- Scheduler created
- Notification: “Your scheduler was successfully set and videos are being imported”
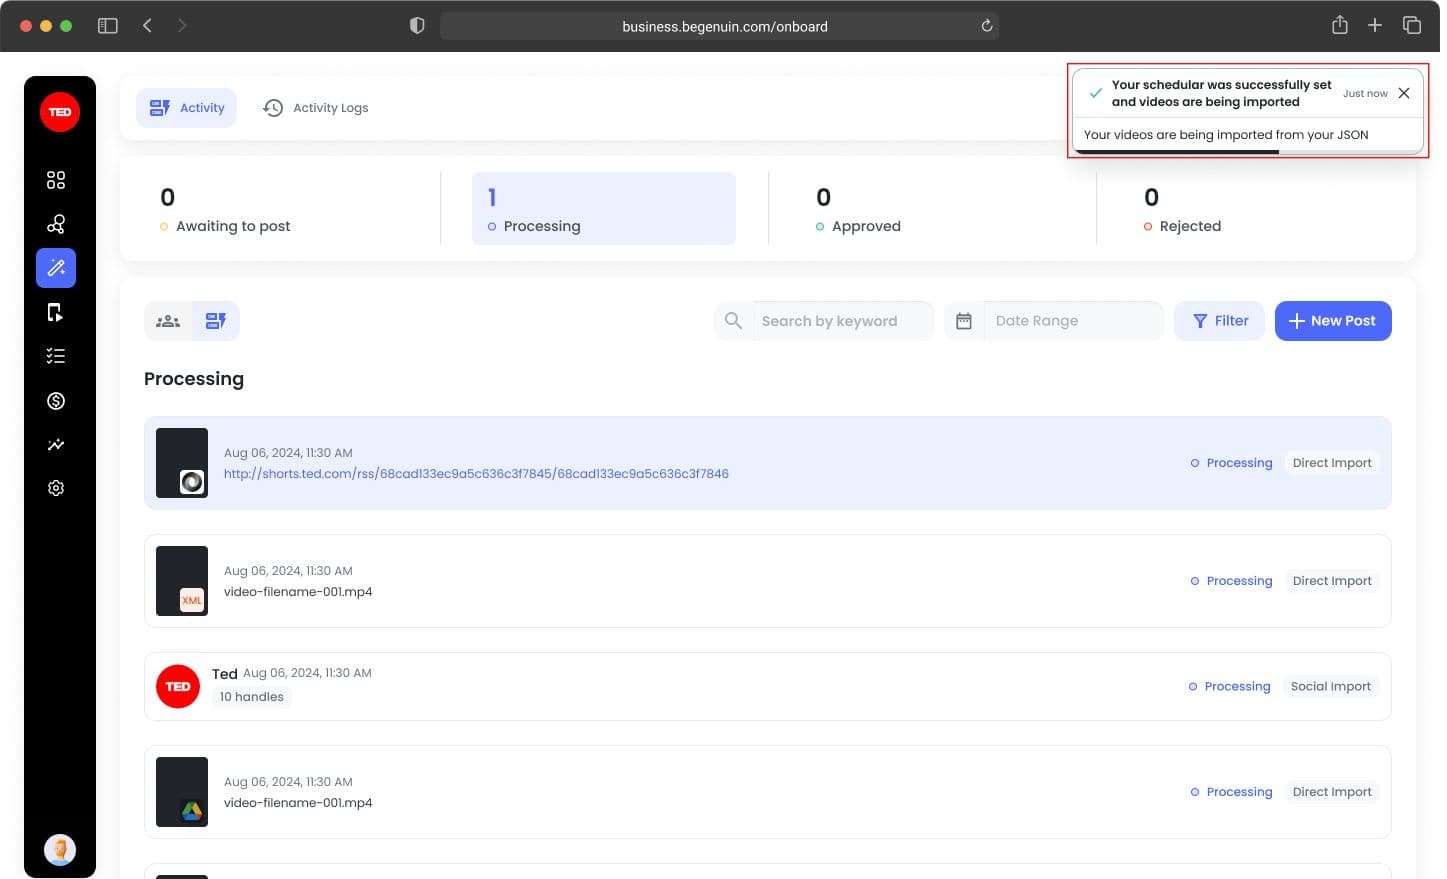
Step 9: Track progress in Activity Dashboard
Go to: Curate > Activity
Statuses:
- Awaiting to Post
- Processing
- Approved
- Rejected
Imported videos appear under:
- Processing tab
- Then move to Awaiting to Post
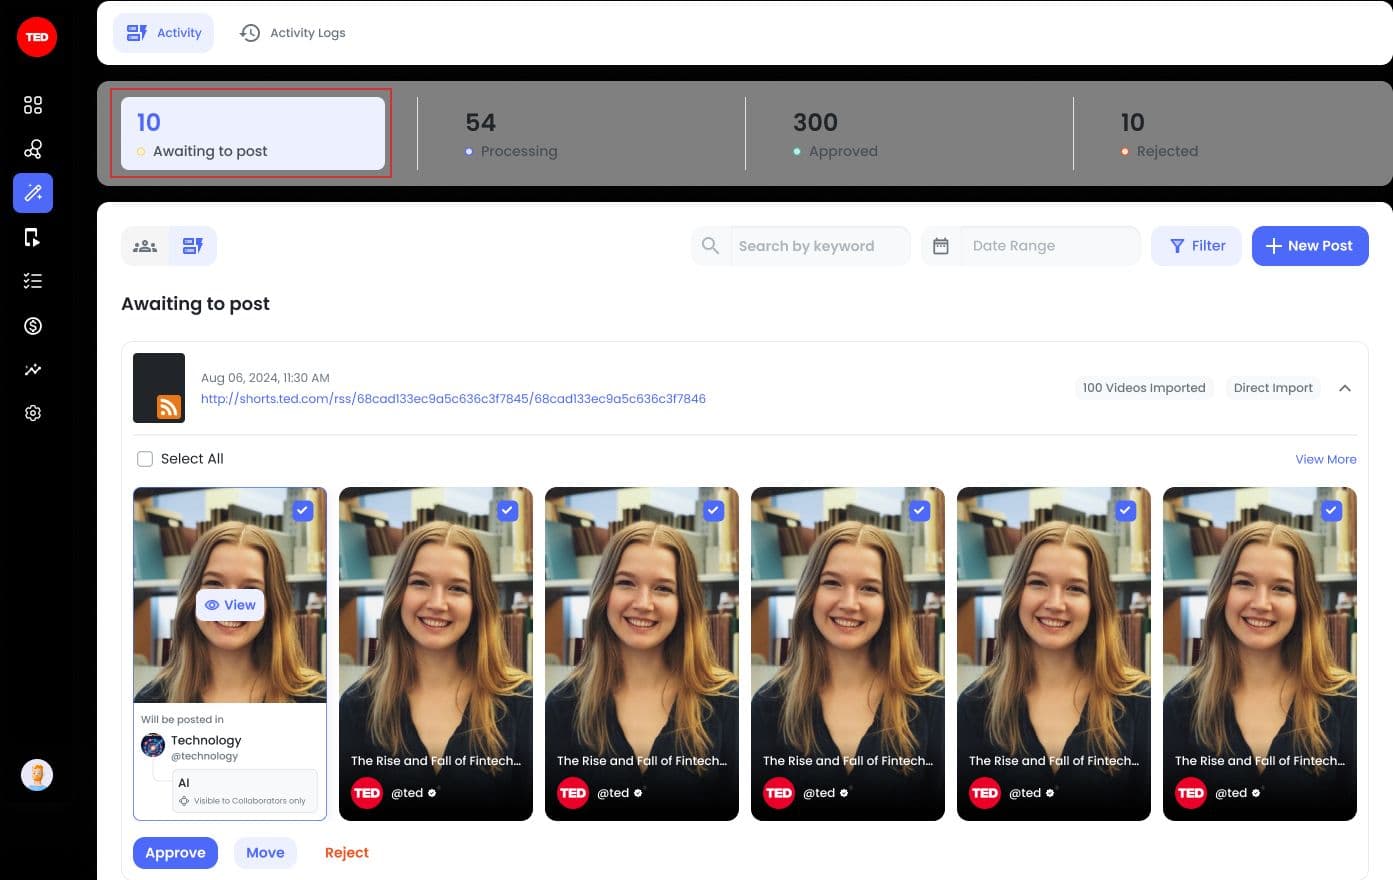
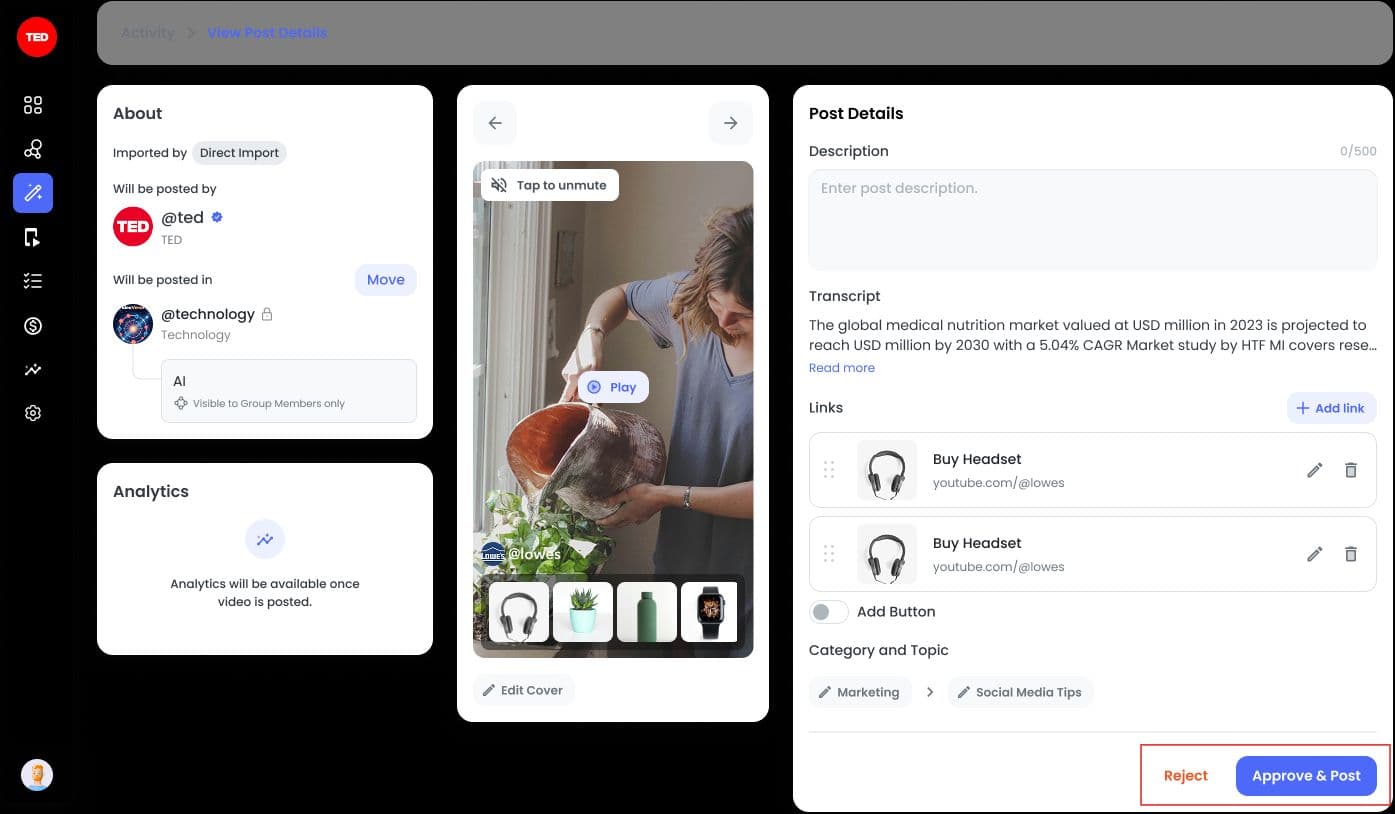
Step 10: Review and publish content
From Activity:
- Click a video - opens Post Detail view
- Actions:
- Approve & Post
- Reject
Navigation: “Next” button moves across posts (even across tasks)
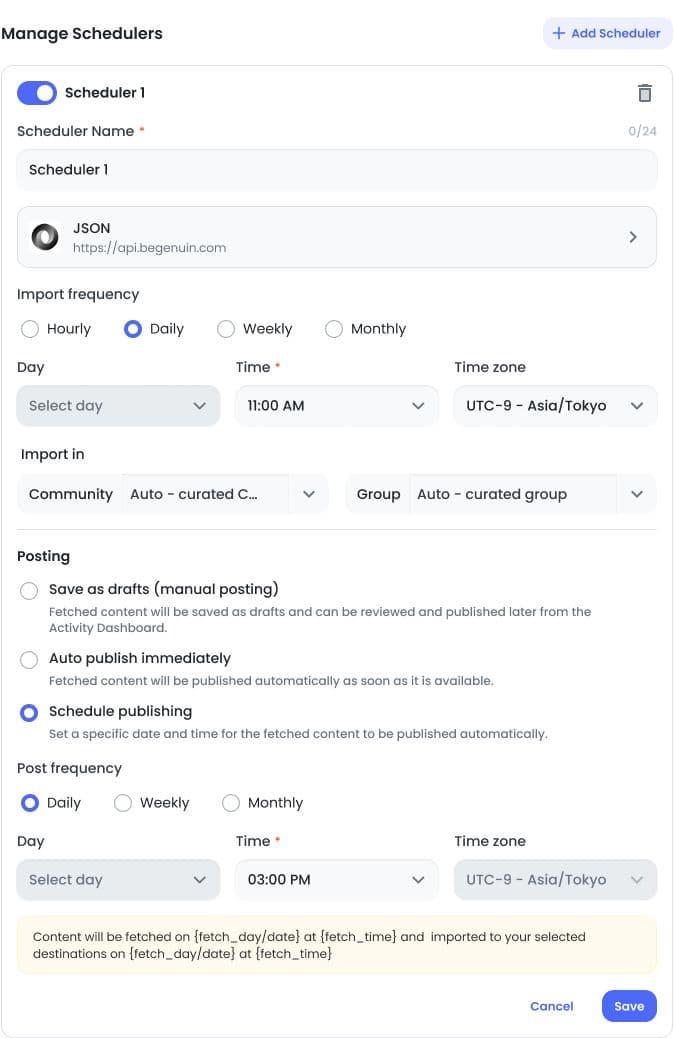
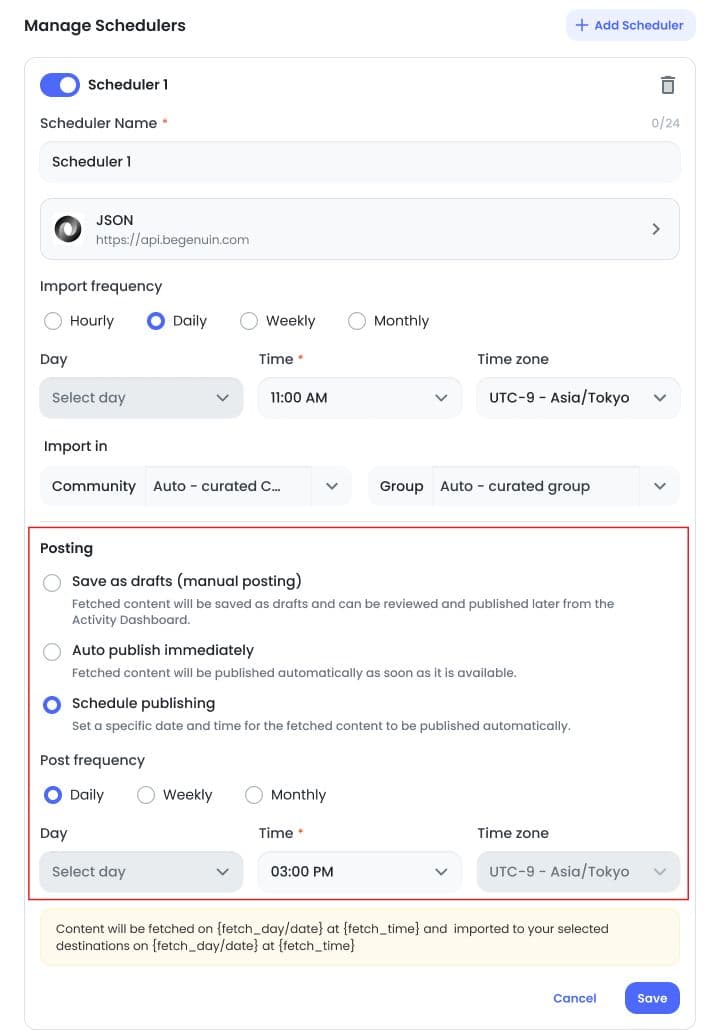
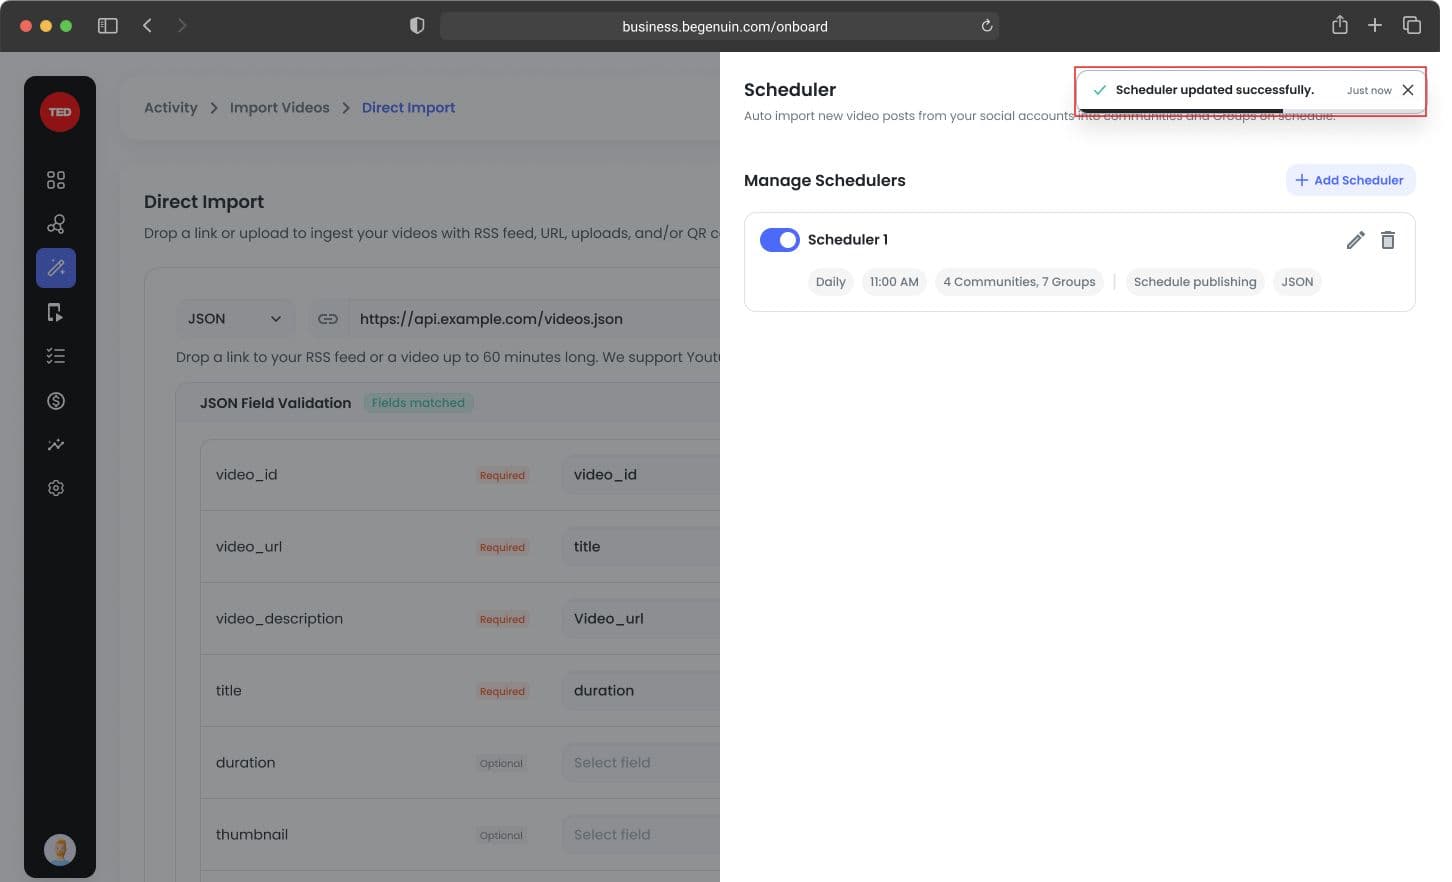
Scheduler Management
Create a scheduler (advanced flow)
Go to: Schedulers > Manage Schedulers > + Add URL
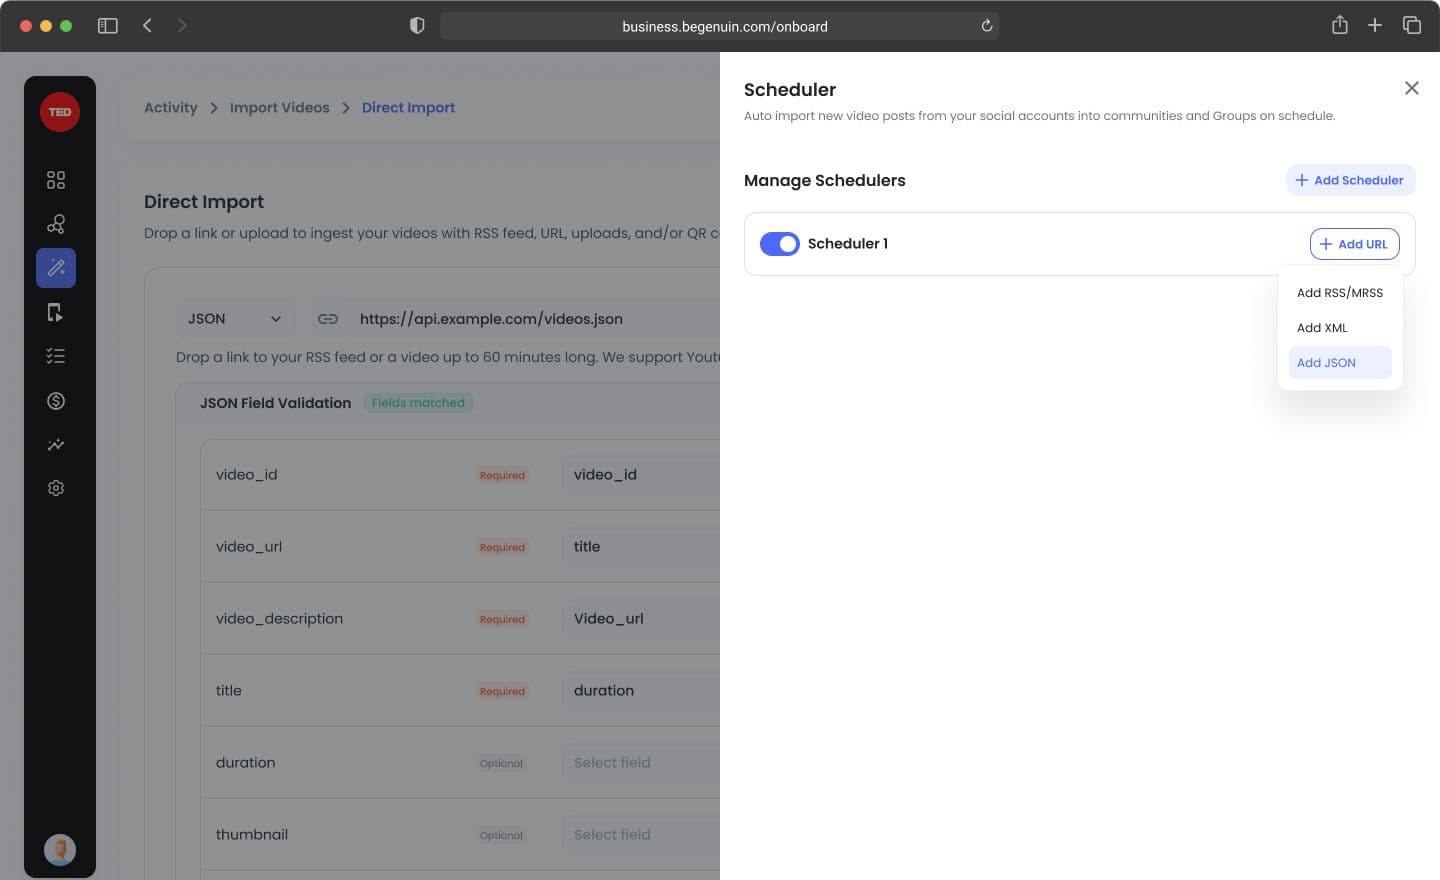
Steps:
- Add JSON URL
2. Validate + AI mapping (~10–15 sec)
3. Configure:
- Field mapping
- Auth
- Query params
Then configure:
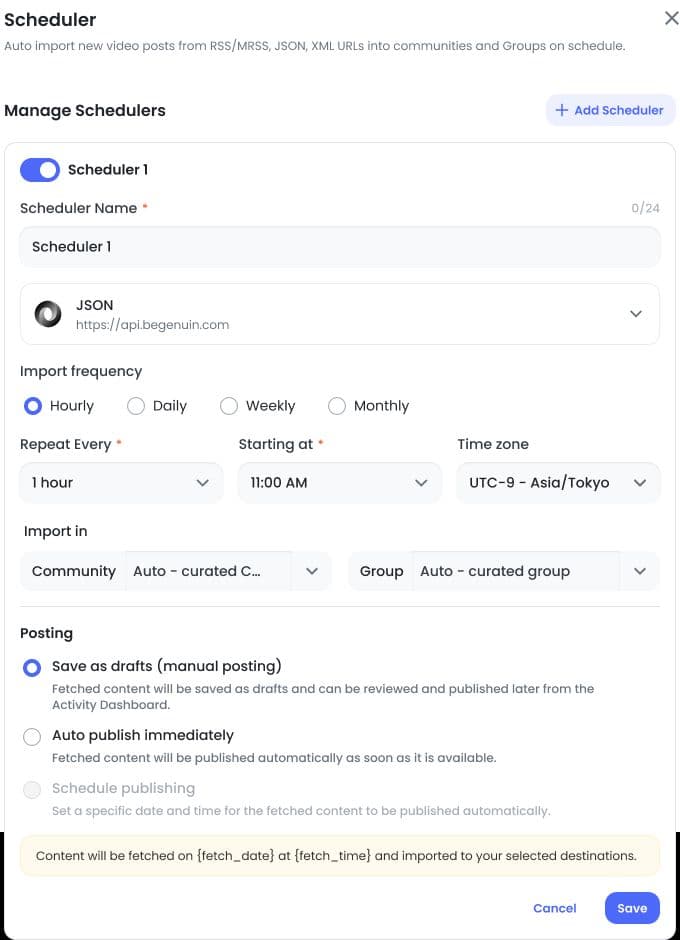
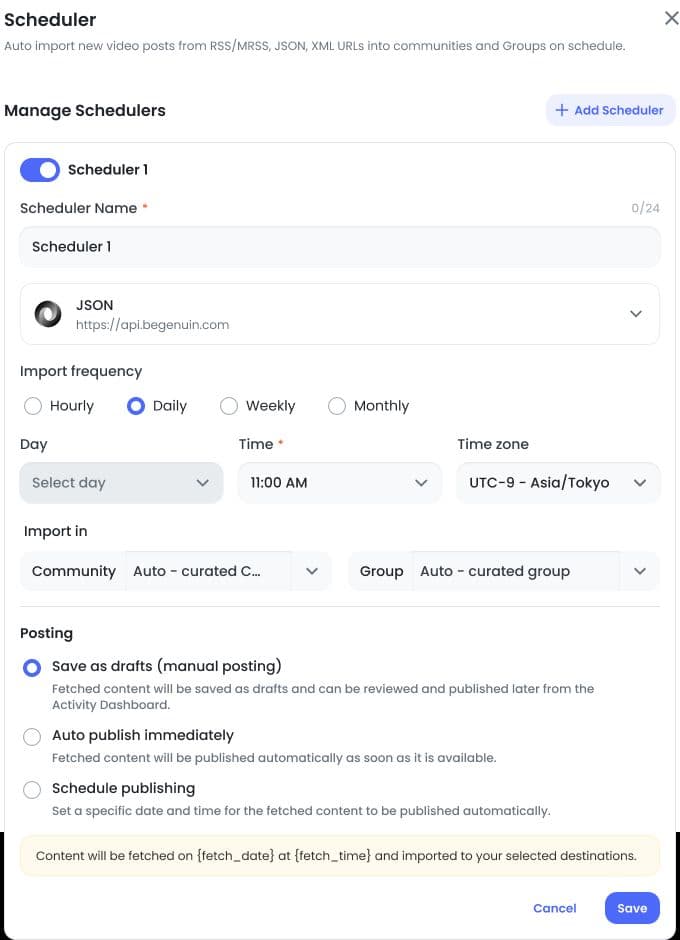
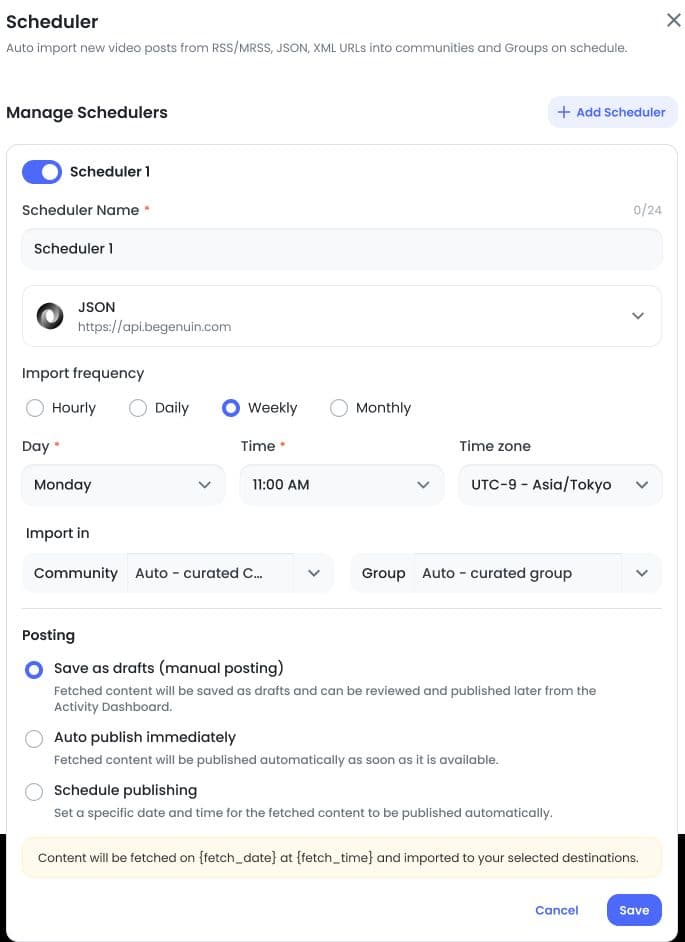
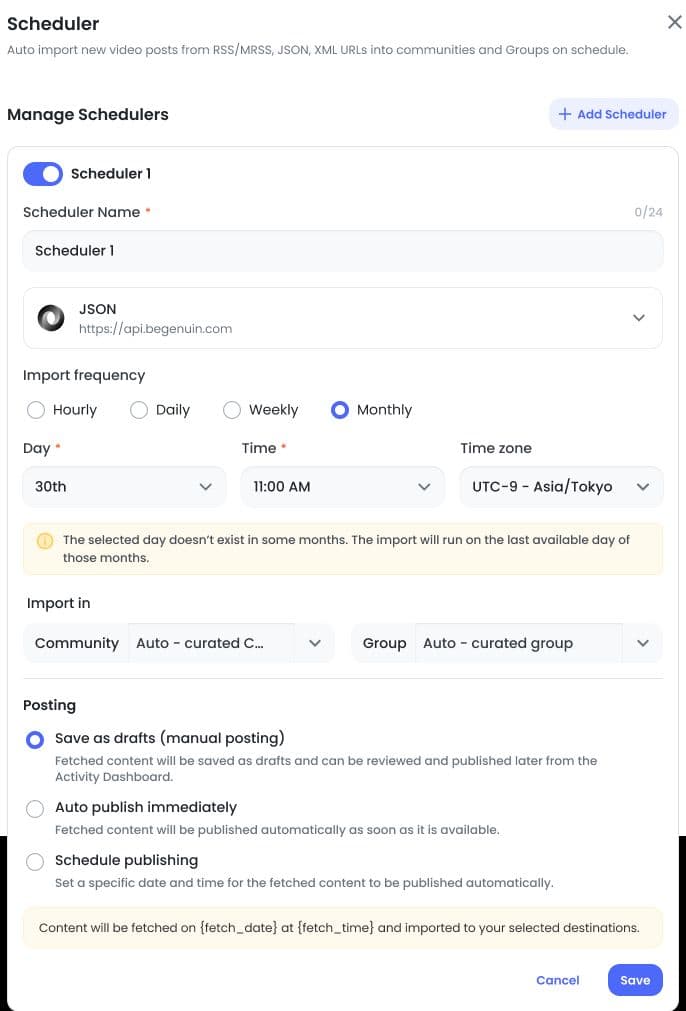
Import Frequency
- Hourly
- Daily
- Weekly
- Monthly
Posting Options
1. Save as Draft: Content available for manual review
2. Auto Publish Immediately: Content auto-published after import
3. Schedule Publishing: Separate posting schedule from import
Scheduling logic examples
Import Frequency: Daily
- Fetch daily at selected time
Import Frequency: Weekly
- Fetch on selected day + time
Import Frequency: Monthly
- Fetch on selected date
Posting logic combinations
Examples:
- Daily import + Weekly posting
- Weekly import + Monthly posting
- Monthly import + Monthly posting
System ensures:
- Posting happens after import
- Time gaps are respected
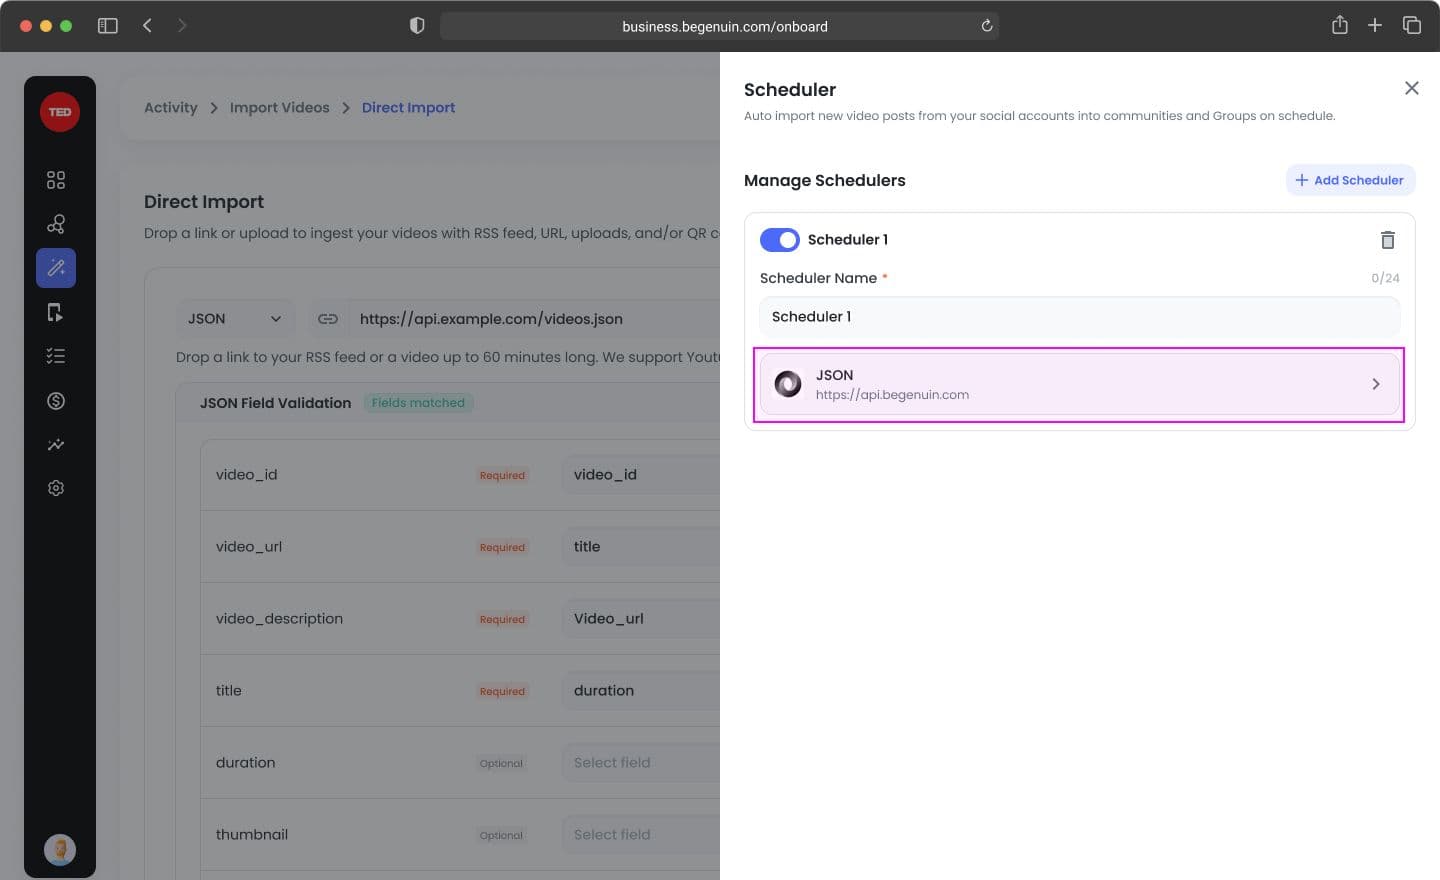
Edit a scheduler
Go to: Schedulers > Click Pencil Icon
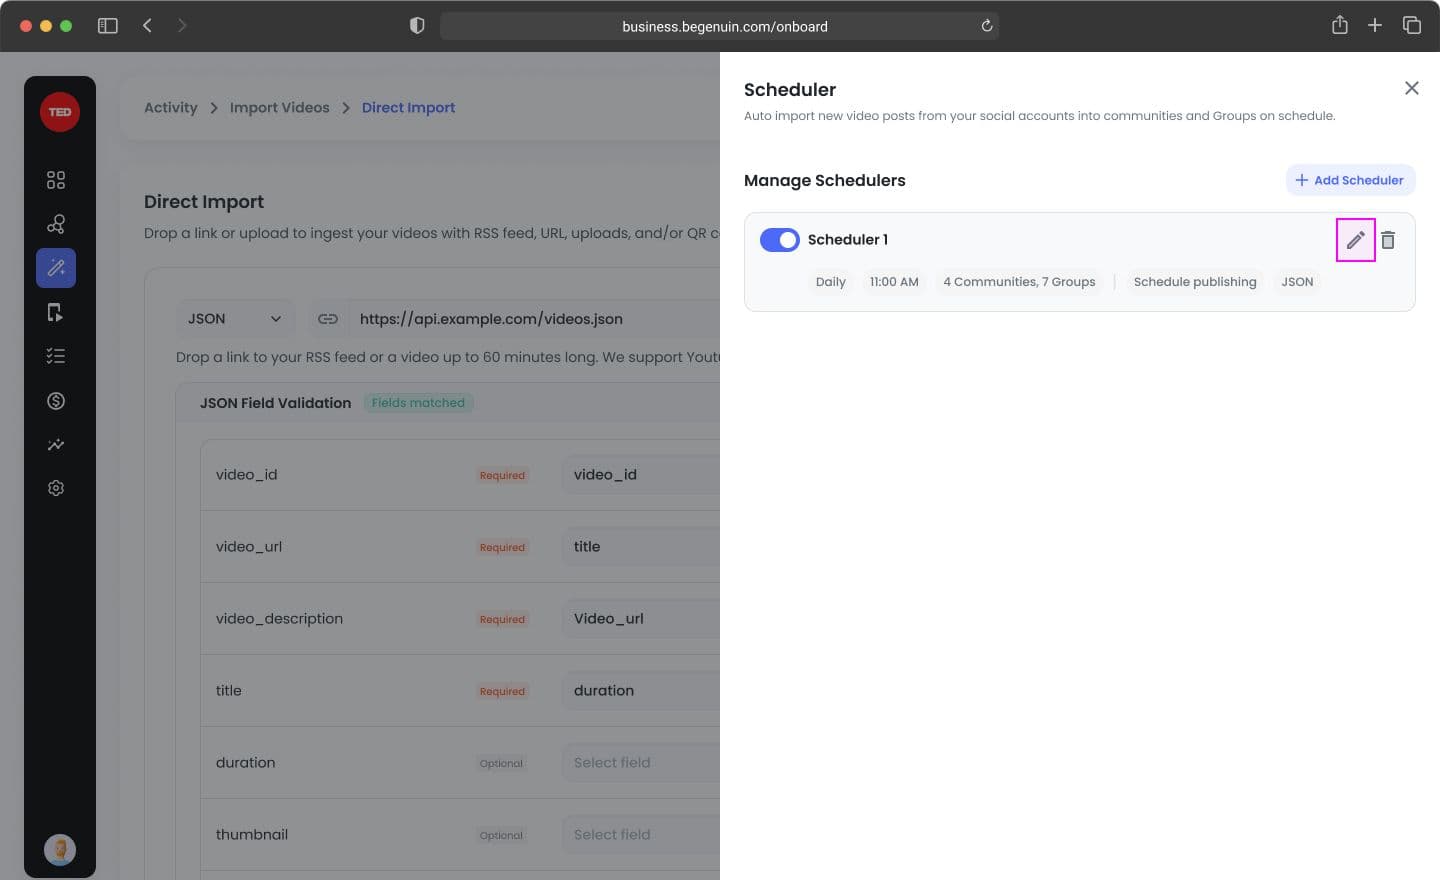
You can edit:
- JSON URL (re-validates + remaps fields)
- Auth / Query parameters
- Posting configuration
Once you finish editing, a confirmation prompt will be displayed. You can then choose to either Cancel the action or Apply Changes.
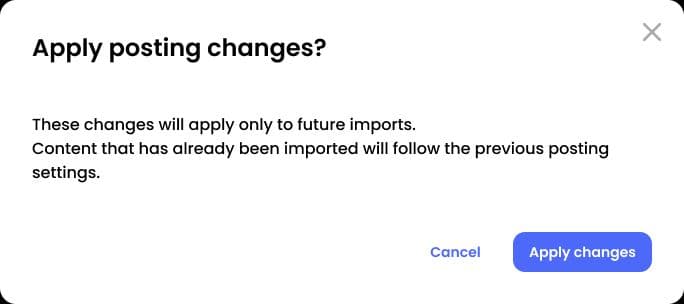
Upon clicking Apply Changes, a confirmation notification will be displayed: “Scheduler updated successfully.”
Posting rules (important)
- If Import = Daily → Post can be Daily/Weekly/Monthly
- If Import = Weekly → Post can be Weekly/Monthly
- If Import = Monthly → Post = Monthly only
- Posting time must be ≥ 4 hours after import time
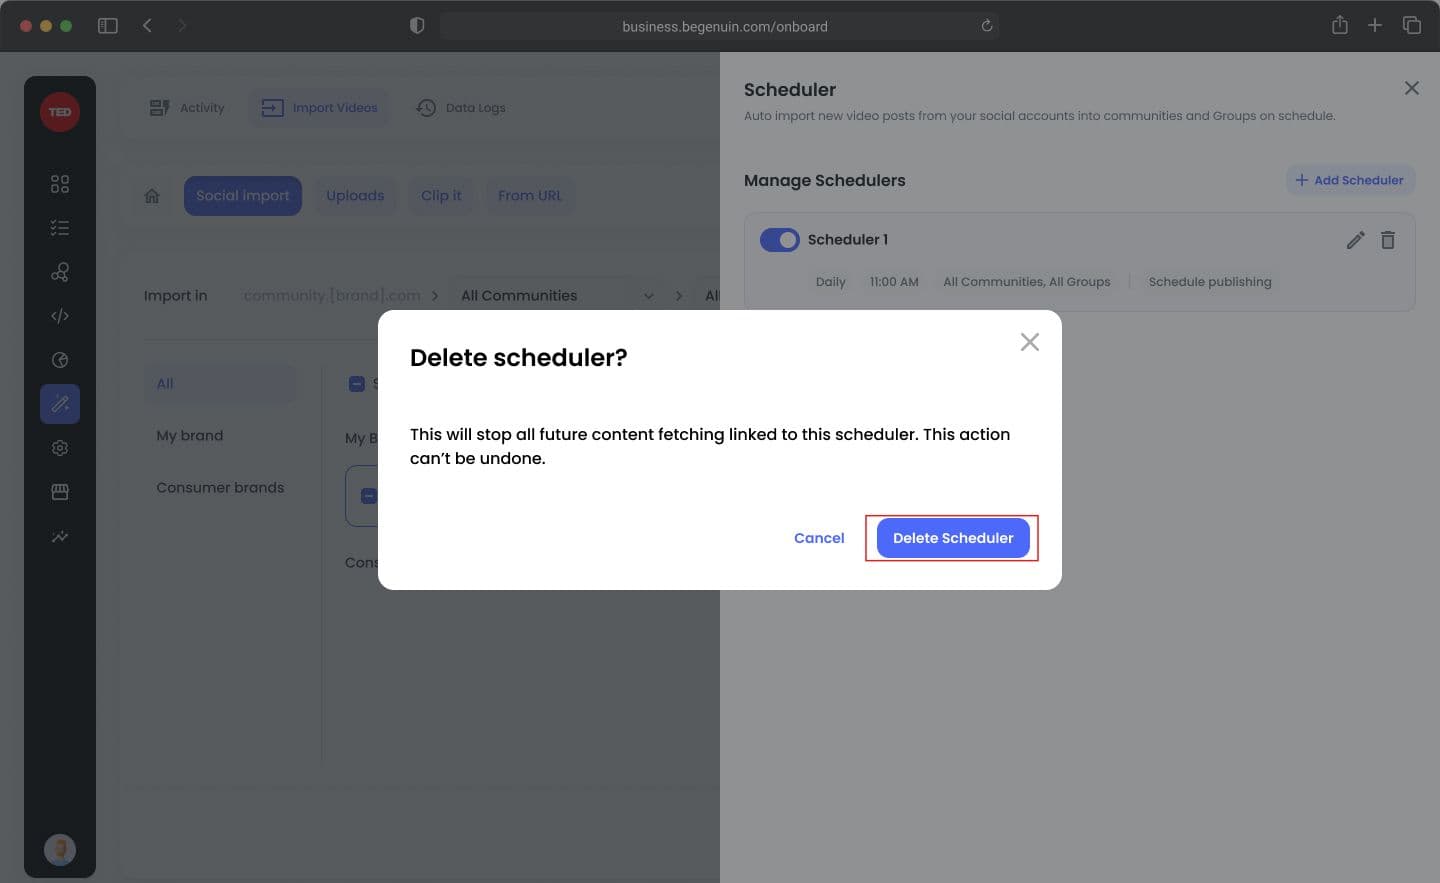
Delete a scheduler
- Click Delete
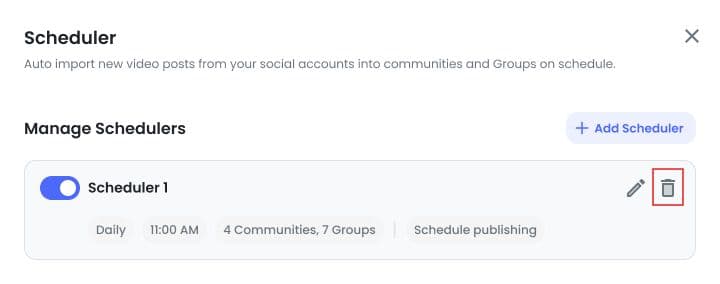
- Confirm action
Add multiple schedulers
- Click + Add Scheduler
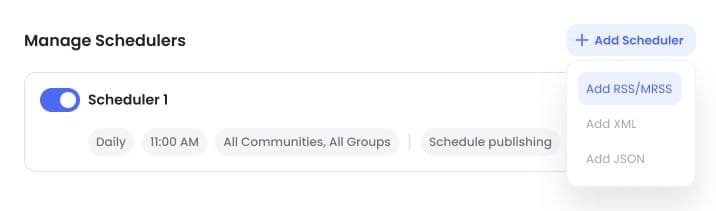
- New scheduler appears at top
Specs & Limitations
System behavior
- AI mapping takes ~10–15 seconds
- Backend handles:
- Deduplication
- Duration filtering (>300 sec rejected)
- Data parsing
Validation rules
- URL must pass all 3 stages
- Required fields must be mapped
- Community & group are mandatory
- Auth fields required when enabled
Limitations
- Max video duration: 300 seconds
- One scheduler per URL per brand
- Max concurrent imports: 3
- Schema changes may break scheduled imports
Example scenarios
1. One-time JSON import
A brand tests a new API:
- Uses Direct Import
- Reviews content before publishing
2. Daily automated ingestion
A publisher:
- Schedules daily import at 11 AM
- Auto-publishes instantly
3. Controlled publishing workflow
A media team:
- Imports daily
- Saves as draft
- Reviews before publishing
4. Multi-frequency setup
A brand:
- Imports weekly
- Publishes monthly campaign content
FAQs
How long does AI mapping take?
~10–15 seconds after URL validation.
Can I override AI-mapped fields?
Yes, using dropdown selection.
What happens if I change the JSON URL?
It re-validates and re-runs AI mapping.
Where do imported videos appear?
In Activity > Processing > Awaiting to Post
Can I schedule both import and publishing separately?
Yes, using Schedule Publishing.
What if my scheduler fails?
You’ll see:
- Error message
- Retry option in Activity
Rules & Best Practices
- Always verify AI field mapping before confirming
- Use pagination for large feeds
- Keep import and posting schedules aligned
- Review draft workflows for quality control
- Avoid duplicate schedulers for same URL
Future Enhancements
- Real-time schema change detection
- Notifications for failed scheduled runs
- Configurable duration limits
- Smarter AI mapping confidence feedback
- Scheduler performance insights
