How Do You Configure Settings in the Brand Control Center for Full Control and Governance?
Overview
Use this guide to understand and configure the Settings module inside the Brand Control Center.
Settings is where you control structure, permissions, branding, white-label configuration, notifications, and billing. It ensures your Community Media Network operates securely, consistently, and in alignment with your business goals.
If you are managing teams, configuring domains, or preparing your network for scale, this is your control layer.
What You Can Configure in Settings
- Manage users and roles
- Define permission structures
- Customize brand identity elements
- Enable white-label domain hosting
- Configure notifications (SMS, Email, Push)
- Monitor billing and invoices
Manage Users and Access
Who this is for
Owners, Admins, and operational leads managing team access.
What problem this solves
As your network grows, access must be structured, not shared informally.
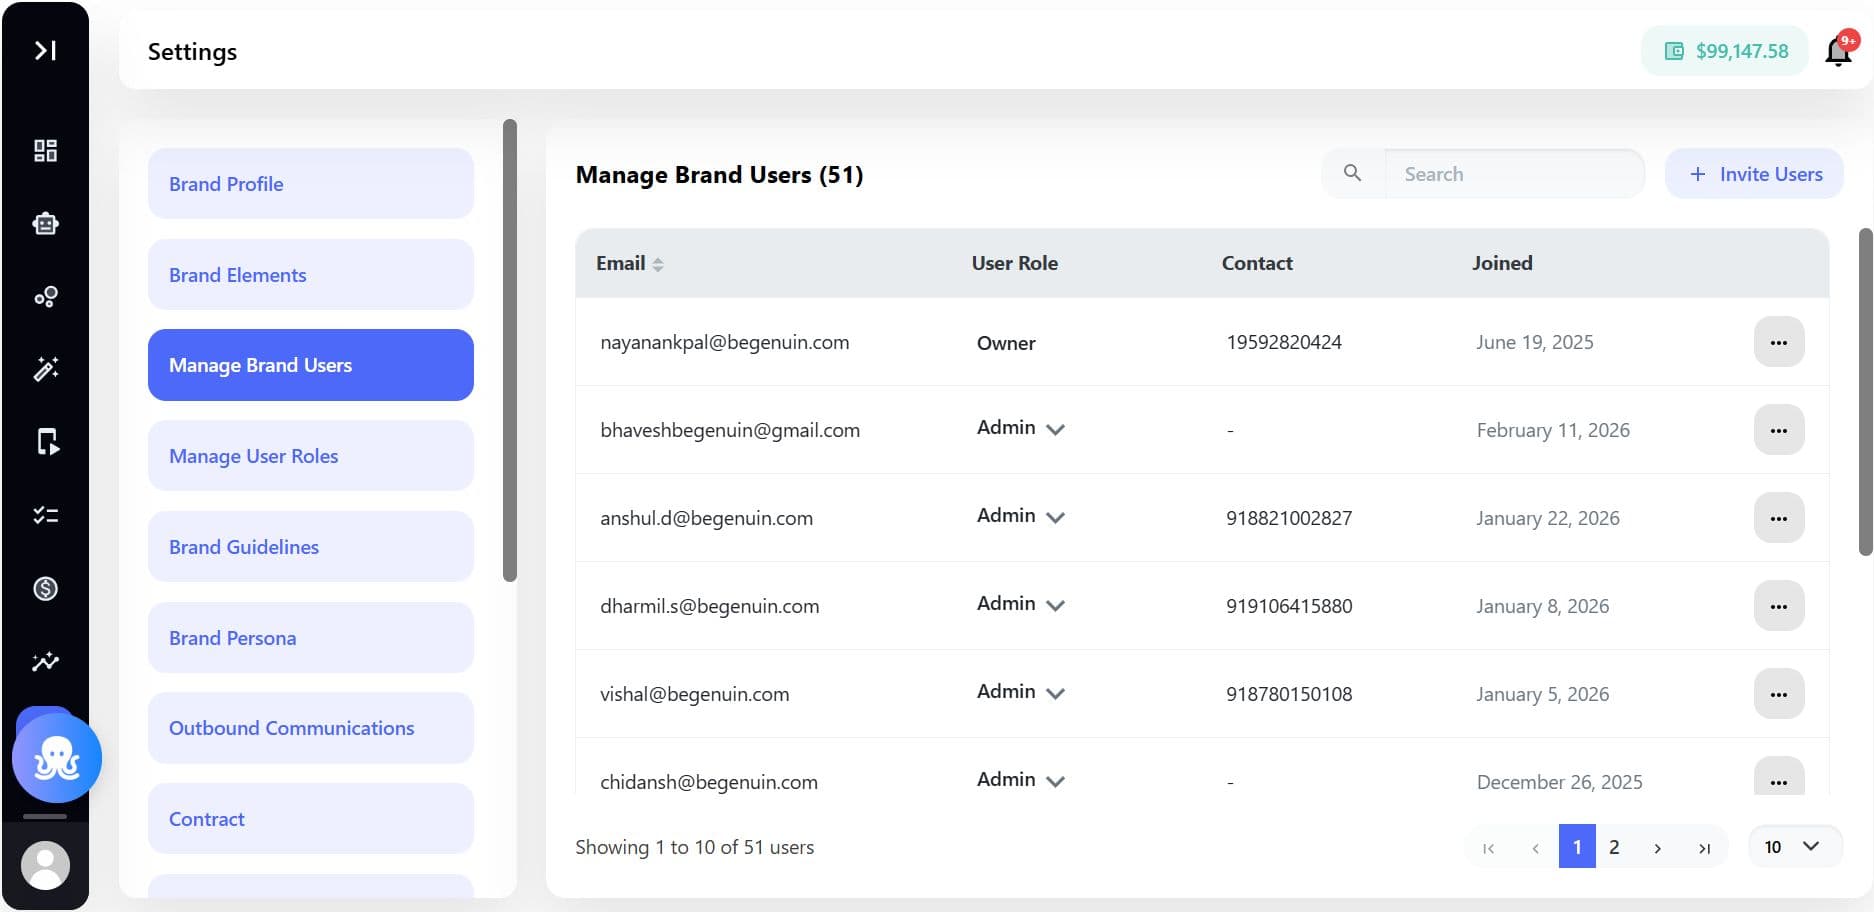
User Management
Inside Settings > User Management, you can:
- View all users in list format (Email, Role, Contact Joining Date)
- Copy Email
- Send user invitations
Owners and Admins have authority to update roles and manage access across the platform.
User Roles & Permissions
Navigate to Settings > User Roles to manage permission structures.
Default roles include:
- Owner
- Admin
- Content Manager
- Brand Moderator
- Viewer (read-only access)
Admins and Owners can:
- Create custom roles
- Assign granular permissions (view, edit, create)
- Define module-level access
Example: A Brand Moderator can be given view/edit/create access only within the Moderation module, without broader administrative rights.
This separation ensures operational clarity and governance.

Configure Brand Settings
What this controls
Your visual identity and domain configuration.
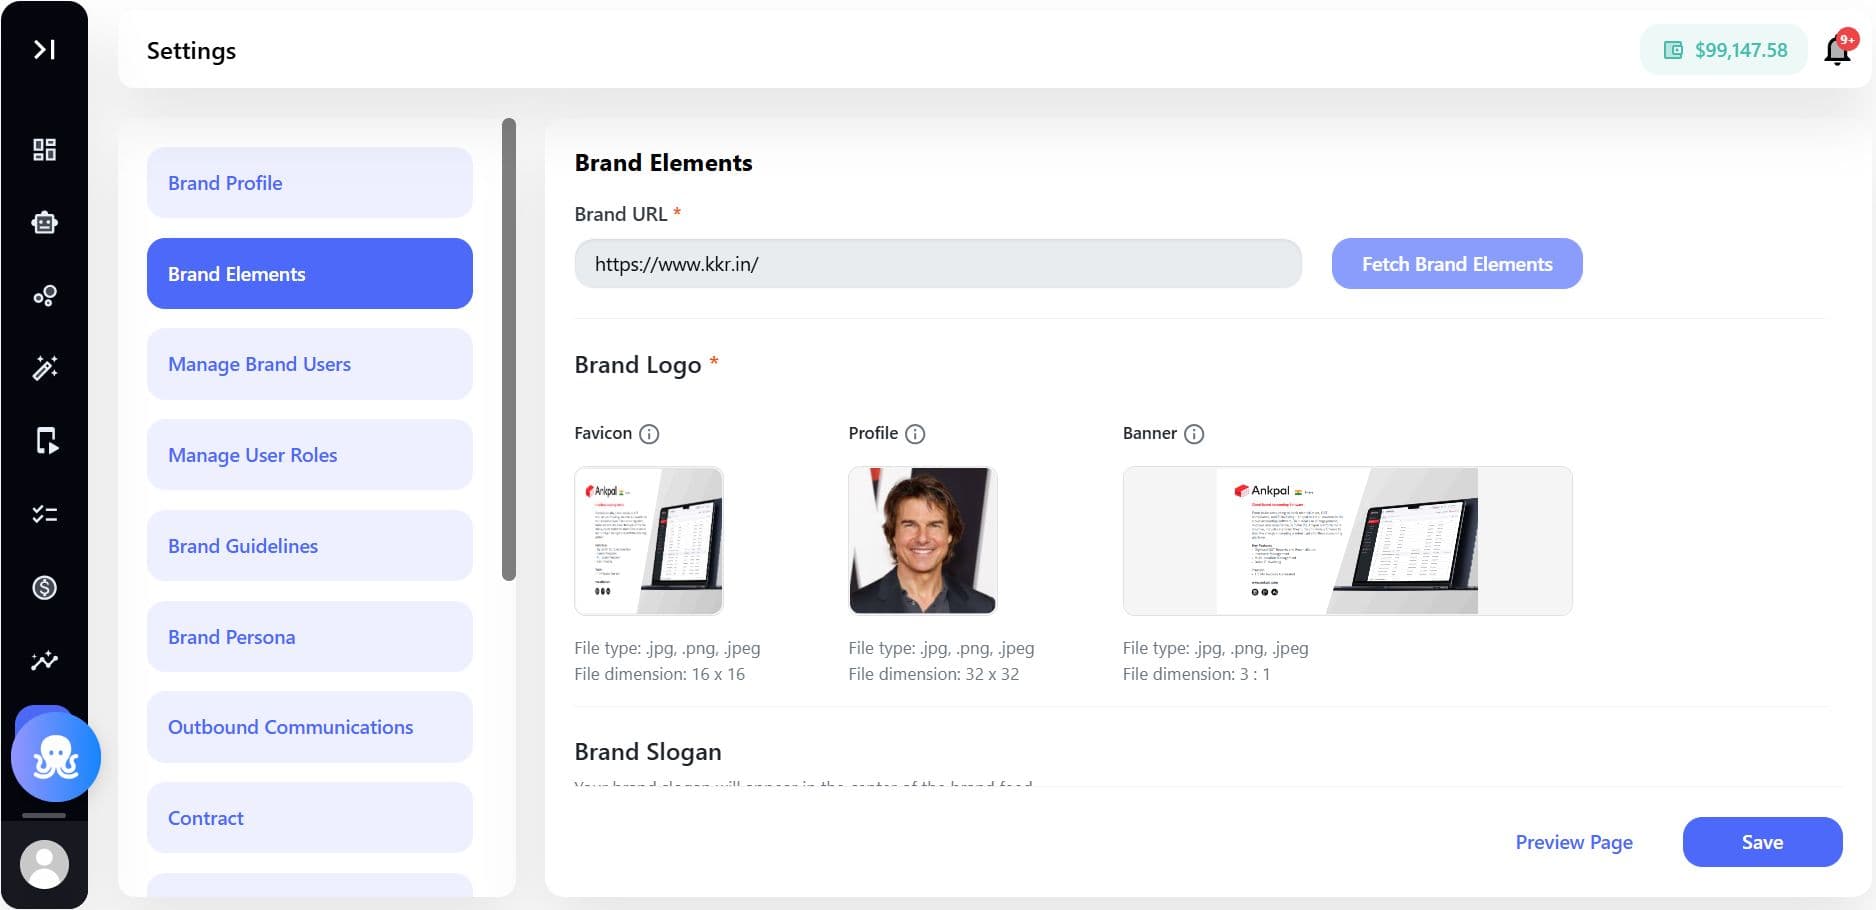
Brand Elements
Under Settings > Brand Elements, you can:
- Upload or update your logo
- Upload a favicon
- Configure brand colors
- Adjust typography
These elements ensure your Community Media Network visually aligns with your main brand ecosystem.
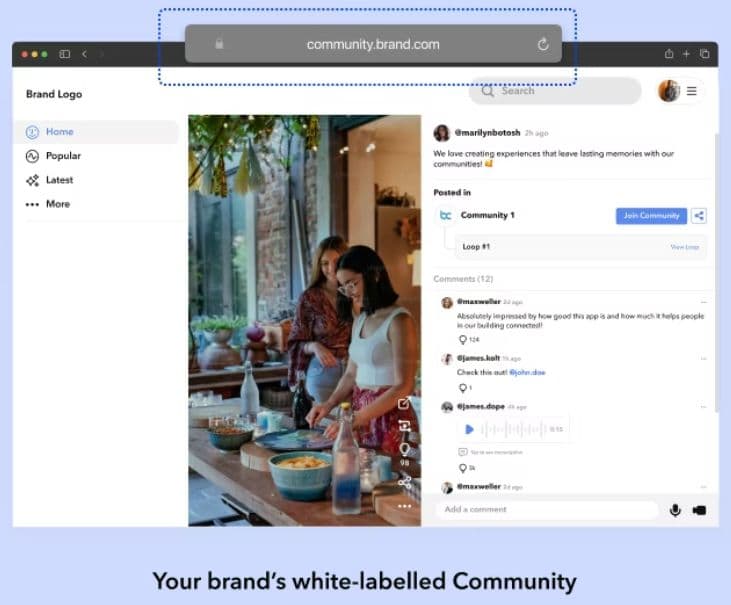
Should You White-Label Your Community?
White-labeling allows your community to live under your own domain instead of a platform-branded URL.
Example:
With white-label: community.yourbrand.com
Without white-label: begenuin.com/community/yourbrand
White-labeling strengthens brand authority, improves SEO, and keeps users fully inside your ecosystem.
How to Configure White-Labeling
Navigate to:
Dashboard > Publish Brand Community > White Label Settings
You will configure:
- Production domain
- QA domain
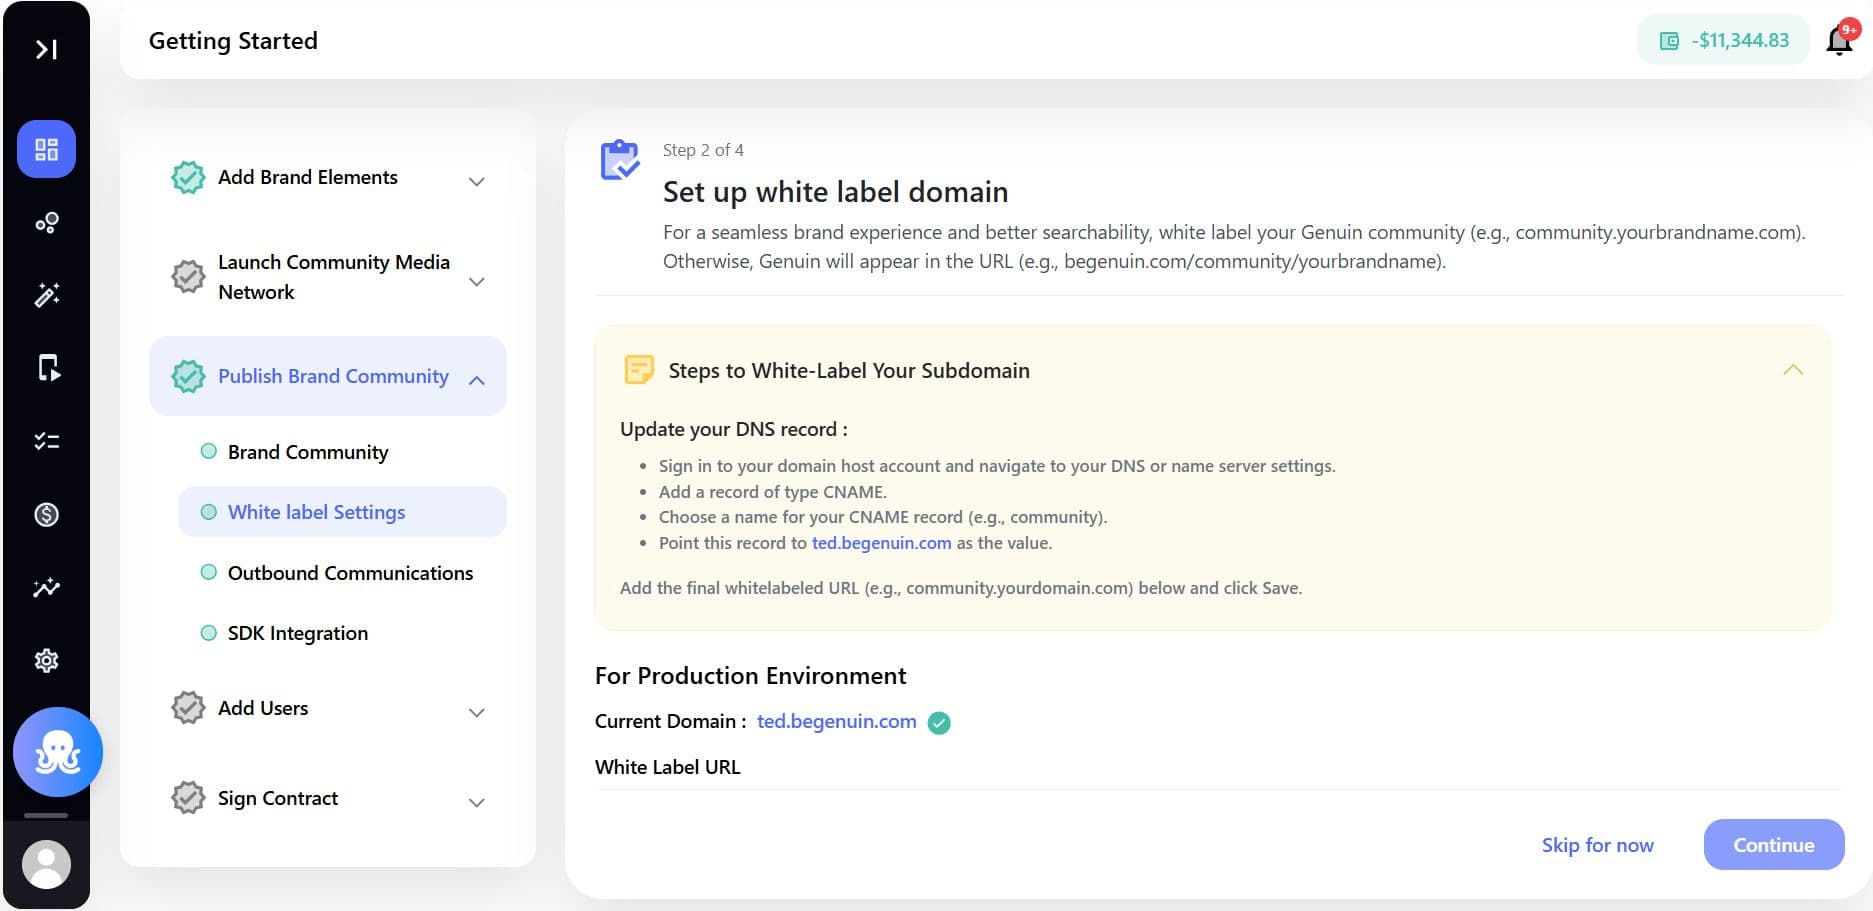
DNS Configuration (CNAME Setup)
To map your custom domain:
- Log into your DNS provider
- Locate DNS Management
- Add a new CNAME record
- Enter:
- Host: your chosen subdomain (e.g., “community”)
- Points to: your Genuin subdomain (e.g., brandname.begenuin.com)
- Save changes
- Wait for DNS propagation (may take up to 48 hours)
- Verify the connection in BCC
After propagation, click Verify Connection inside White Label Settings.
Steps to configure the necessary CNAME records for various common DNS hosting providers. You will need to access your provider's control panel or dashboard to follow these instructions. In all cases, use the specific CNAME record details provided by Genuin.
GoDaddy
- Sign in to your GoDaddy Domain Control Center.
- Select the domain you wish to configure to open the Domain Settings page.
- Scroll to Additional Settings and click Manage DNS.
- In the Records section, select Add or Edit to modify or create your CNAME record.
- Enter the CNAME record details provided by Genuin and save your changes.
Namecheap
- Log into your Namecheap account.
- From the left sidebar, select Domain List, and then click the Manage button next to your domain.
- Go to the Advanced DNS tab.
- In the Host Records section, click Add New Record.
- Select CNAME Record from the drop-down menu and enter the details provided by Genuin.
- Click the checkmark to save the record.
Bluehost
- Log into your Bluehost control panel.
- Click Domains from the top navigation menu.
- Select the domain you want to manage, and then click DNS Zone Editor.
- Scroll down to the CNAME section and click Add Record.
- Enter the CNAME record details provided by Genuin and save the record.
HostGator
- Log into your HostGator cPanel.
- In the Domains section, click Zone Editor.
- Click Manage next to the domain you are configuring.
- Click +CNAME Record to initiate the addition of a new record.
- Enter the necessary CNAME record details and click Add Record.
Google Domains
- Sign in to Google Domains.
- Select your domain.
- If the side menu is not open, click the domain name to open it.
- Click DNS in the left-hand menu.
- Scroll to the Custom resource records section and add your CNAME record using the Genuin details.
AWS Route 53
- Sign in to the AWS Management Console and access the Route 53 console.
- In the navigation pane, choose Hosted zones.
- Select the name of the domain you need to update.
- Choose Create Record Set.
- Specify the CNAME settings using the details provided by Genuin.
Cloudflare
- Log into your Cloudflare account and select your domain.
- Navigate to the DNS settings tab.
- Click Add record.
- Select CNAME from the type dropdown, enter the details as instructed by Genuin, and save the record.
Why White-Labeling Matters
White-labeling:
- Consolidates SEO authority under your main domain
- Improves discoverability in search engines
- Reinforces brand credibility
- Prevents traffic fragmentation
- Keeps monetization fully brand-owned
For serious network operators, white-labeling is strongly recommended.
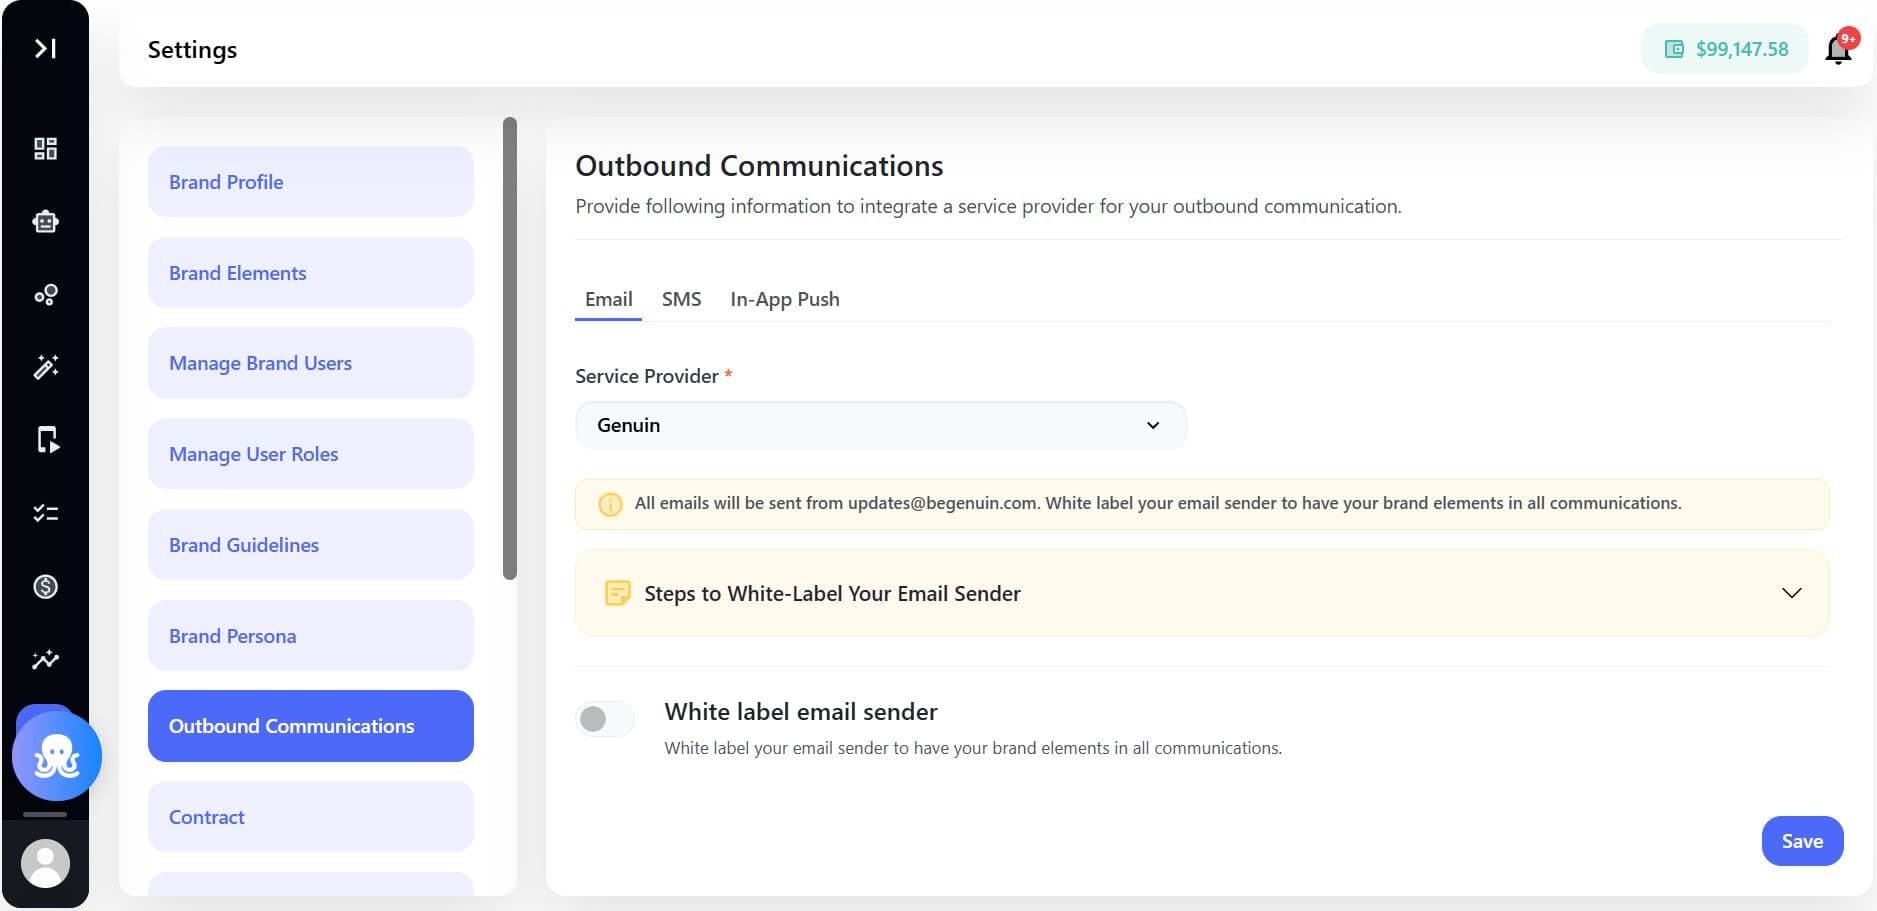
Configure Notifications
Navigate to Settings > Outbound Communication.
You can integrate:
SMS
- High open rate
- Ideal for urgent alerts
- Suitable for newsletters and detailed updates
- Supports multimedia and longer communication
In-App Push
- Cross-platform push notifications
- Real-time delivery
- Supports rich notifications
These integrations allow you to control how your community communicates across channels.
How Settings Fits Into Your Network Strategy
Settings are not just configuration.
It defines:
Access control > Governance > Brand identity > Domain ownership > Communication > Content management
When structured correctly, it ensures your Community Media Network scales securely and professionally.
What to Configure Next
After setting up your Settings module:
- Review user roles and permission structure
- Complete white-label configuration
- Validate notification integrations
- Confirm billing alignment with usage
Your Brand Control Center is now structured for scale, with governance, branding, and control fully in place.
